Forra Corporation

THE FORRACORP PROJECTS GALLERY

A Convergence of Craftsmanship and Innovation:
Over Two Decades of Engineering Excellence by Ubi Fredrick.

Welcome to the official digital Projects Gallery of Ubi Fredrick, the Chief Architect and Principal Engineer behind ForraCorp. This platform serves as a comprehensive display of a multi-disciplinary journey spanning over twenty years—a journey from the precision of hardware engineering to the frontier of Artificial Intelligence and strategic leadership.

ForraCorp is the commercial vehicle through which I deliver high-level, bespoke solutions to global clients. Whether I am 'talking to an AI' through prompt or it is an automated Python script, a resilient power infrastructure, or a cinematic literary epic, I remain the primary visionary and lead engineer behind every project featured here. Explore a legacy built on the principle that "knowledge is for the living," and excellence is the only standard.

Thematic Highlights

I have categorized my projects into six thematic pillars.

My Technical & Linguistic Skills Matrix:


Technical Skills
Category Specific Skills & Toolkits
Artificial Intelligence Generative AI, Prompt Architecture, Machine Learning (LSTMs, Model Architecture), Data Cleaning/Preprocessing, Pandas, NumPy, Matplotlib, Scikit-learn, Predictive Analysis.
Software Development Python Development (Advanced), Django (Fullstack), Tkinter (Desktop Apps), Playwright (Web Crawling/Data Extraction), SMTP (Email Systems), GitHub/Git.
Power Engineering Custom Transformer Winding (Toroidal & E-I), Inverter Design (Pure Sine & Square Wave), AVR Construction, Phase Balancing, 3-Phase Distribution.
Narrative Architecture & Audio Production Authored a suite of novels and developed a "360° Narrative Engagement Ecosystem" with dedicated theme songs for each literary work. Cryptographic and Linguistic Engineering where I created the "Graillandic Cipher," a proprietary visual orthographic system based on a modified Level 1 Braille structure.
Electronics & Mechatronics DTMF Signaling, Robotics (Multi-axis Arms), PCB Etching (Chemical/Toner Transfer), Op-Amp Comparators, Sensor Integration (Proximity/IR/PIR).
Systems Specialist CCTV (IP/Analog/NVR), RFID Access Control, AnyDesk/TeamViewer Support, Windows/Linux/macOS Administration, BIOS/UEFI Diagnostics.
Tactical & Safety Defensive/Evasive/Aggressive Driving, Rescue Swimming (Life Saving), First Aid/CPR, Physical Security Oversight.
Industrial Trades Modern Carpentry (HDF/MDF/Modular), Electrical Installations (Conduit/Surface), AV Connectivity (SDI/XLR/Dante-ready), Audio Mixing (X32).
Management & Planning HR Management, Project Supervision, Technical Drafting (Schematics), Resource Allocation, Training & Mentorship.
Linguistic Skills
Language Group / Script Proficiency Level
Spoken Languages
English Professional (Read, Write, Speak)
West African Pidgin English Native (Read, Write, Speak)
French / Spanish / Greek Elementary
Sign Languages
American Sign Language (ASL) /
British Sign Language (BSL) /
Nigerian Sign Language (NSL)
Translator & Interpreter; Developer of 'Wind Talker' Curriculum
Tactical / Tactile
Level 1 Braille Proficient (Read & Write)
Graillandic Script
Language Graillandic (Proprietary Cipher) Expert (Script Creator)
PILLAR ID : 001

ML Models | Advanced Python Development | Web Development

The Digital Brain: Data, Logic, and Automation This section represents the frontier of my technical journey. Here, I leverage Python and the Django framework to build "smart" systems that predict the future and automate the present. From financial forecasting models to automated data harvesting, these projects demonstrate my ability to transform raw data into a strategic business asset.

PILLAR ID : 002

Robotics | Electronics | Advanced Control Systems

The Mechanical Interface: Bridging Code and Kinetic Motion True innovation happens where software meets hardware. These projects showcase my expertise in Mechatronics—creating machines that can see, feel, and respond to their environment. By designing custom PCBs and programming complex logic, I build robotic systems that perform precise industrial tasks and interactive human-machine communication.

PILLAR ID : 003

Power Engineering | Electrical Infrastructure

The Foundation: Robust Energy and System Design Reliable power is the heartbeat of every industry. My background in power engineering spans over two decades of custom transformer winding, high-capacity inverter design, and the construction of ultra-wide range voltage stabilizers. These entries highlight my capacity to design and install electrical systems that are built for 24/7 reliability in demanding environments.

PILLAR ID : 004

Systems Specialist | Security Support | Audio Visual

The Operational Shield: Protection, Connectivity, and Support A safe and connected business is a productive one. In this section, I detail my work in deploying comprehensive security grids (CCTV and RFID), managing multi-source power changeovers, and architecting professional audio-visual networks. This pillar also covers my remote diagnostic services, ensuring system uptime through advanced virtual support.

PILLAR ID : 005

Leadership | Human Resources | Management

The Human Capital: Personnel optimization, mentorship, and logistics technology is only as effective as the people who manage it. As a Human Resources Manager and Project Supervisor, I focus on personnel optimization and technical mentorship. These projects reflect my experience in leading multi-disciplinary teams, mentoring a new cohort of technical professionals, and managing the complex logistics of both commercial and volunteer construction.

PILLAR ID : 006

Authorship | Story & Song Writing | Specialized Skills

The Personal Narrative: Inclusion, Writing, and Survival Beyond the machine lies the human experience. This pillar houses my work as a novelist, a song producer and the creator of the Graillandic Script. It also highlights my commitment to global inclusion through native-level Sign Language and Braille literacy, alongside tactical life-safety skills like defensive driving and rescue swimming—ensuring preparedness for any environment, whether physical or digital.

TROVE ID : 001

ML Model: Advanced Time-Series / Financial Forecasting

Featured in chapter 7 of my book: The Shadow Agent.
Data Visualizations
Skills / Tools Leveraged

This project showcases my ability to blur the lines between fiction and reality. I utilized Python, TensorFlow/Keras, and Scikit-Learn. The core architecture relies on Long Short-Term Memory (LSTM) networks, which are specialized for sequence prediction. For data preparation, I used Min-Max Scaler (MinMaxScaler) to normalize financial data, ensuring the model could handle volatility. This project demonstrates my proficiency in handling "Time-Series" data—arguably the most complex data type—and my ability to translate a fictional "Shadow Agent" concept into a working, deployable Python script.

The Challenge / Need / Problem

While the protagonist of my novel, The Shadow Agent, utilizes these systems to track criminal syndicates, the real-world application addresses market volatility and complex financial trends. Traditional linear models (like Moving Averages) fail to capture the non-linear, "hidden" patterns in sequential data. The problem was to create a model that doesn't just look at the last price, but understands the temporal dependencies—the "memory" of what happened days or weeks ago—to predict the next move with high precision.

The Solution

I developed a Stacked LSTM (Long Short-Term Memory) Neural Network. Unlike standard neural networks, LSTMs have "gates" that decide what information to keep or discard, making them perfect for "Financial Forecasting." By applying Min-Max Scaler, I scaled the data between 0 and 1, which prevents larger numerical values from dominating the model's weights. This allows the model to detect subtle shifts in the "Global Security District" data, enabling the protagonist (and the user) to thwart "crimes" or market losses before they occur.

Step-by-Step Process
  • Components:
    Python 3.x, Pandas, NumPy, Keras, Matplotlib.
  • Data Acquisition:
    Load the time-series data using Pandas.
  • Preprocessing:
    Use Min-Max Scaler to normalize the data.
  • Reshaping:
    Convert data into a 3D tensor [samples, time steps, features] required by LSTM.
Model Building:
 
                        
import pandas as pd
import numpy as np # Added for data manipulation

from tensorflow.keras.models import Sequential
from tensorflow.keras.layers import LSTM, Dense
from sklearn.preprocessing import MinMaxScaler # Added for data normalization

# --- 1. Load and Prepare Training Data ---
# 'fragment_data.csv' contains small, known-decrypted snippets 
df = pd.read_csv('fragment_data.csv') 

# Define features and target
features = ['global_index', 'commodity_volatility', 'currency_pair'] 
target = 'syndicate_profit_factor' 

# 1a. Preprocessing (Normalization and Sequence Creation)

# Normalize the data (Crucial for LSTMs)
scaler = MinMaxScaler(feature_range=(0, 1))
scaled_data = scaler.fit_transform(df[features + [target]])

# Define Sequence Parameters
time_steps = 10    # Look back 10 time steps
n_features = len(features) # Number of features is 3

# Function to create sequences (X) and targets (y)
def create_sequences(data, time_steps):
    X, y = [], []
    for i in range(len(data) - time_steps):
        # The sequence of input features
        X.append(data[i:(i + time_steps), :-1])  # All features except the last column (target)
        # The target at the end of the sequence
        y.append(data[i + time_steps, -1])     # Only the last column (target)
    return np.array(X), np.array(y)

# Create the training sequences
X_train, y_train = create_sequences(scaled_data, time_steps)

# Create the placeholder for current market data (must match X_train shape)
# This simulates getting the last 'time_steps' observations of the features
current_market_X = scaled_data[-time_steps:, :-1]
current_market_X = np.expand_dims(current_market_X, axis=0) 
# The shape is now (1, time_steps, n_features) for a single prediction

print(f"X_train shape: {X_train.shape}")
print(f"y_train shape: {y_train.shape}")

# --- 2. Build the LSTM Model --- 

model = Sequential()
# The input_shape is now defined by time_steps and n_features
model.add(LSTM(units=100, return_sequences=True, input_shape=(time_steps, n_features))) 
model.add(LSTM(units=50))
# The final Dense layer should match the number of target variables (1)
model.add(Dense(units=1, activation='linear')) 
# [attachment_0](attachment)

# --- 3. Train the Model (Teaching it the ALGORITHM OF GREED) --- 

model.compile(optimizer='adam', loss='mse')
# Ensure X_train and y_train are correctly shaped before this step
model.fit(X_train, y_train, epochs=20, batch_size=32, verbose=0) 

# --- 4. Predict the key input variable --- 
# predicted_factor will be the numerical variable needed for the final decryption key. 

predicted_factor_scaled = model.predict(current_market_X)

# Inverse transform the prediction back to its original scale
# Since we only predicted ONE target variable, we create a temporary array for inverse transformation
temp_array = np.zeros((1, scaled_data.shape[1]))
temp_array[0, -1] = predicted_factor_scaled[0, 0] # Put the prediction in the target column

# Inverse transform the target column only
predicted_factor = scaler.inverse_transform(temp_array)[0, -1]


print("-" * 30)
print(f"Prediction (Scaled): {predicted_factor_scaled[0, 0]:.4f}")
print(f"Predicted Syndicate Profit Factor (Original Scale): {predicted_factor:.2f}")


To experience a day in the life of 'The Shadow Agent,' see Chapter 7.
TROVE ID : 002

ML Model: Inventory and Expiration Prediction

ML Model
Skills / Tools Leveraged

This project required a deep dive into Supply Chain Analytics and Supervised Learning. I utilized Python (Pandas, Scikit-Learn) and XGBoost, an optimized gradient boosting library. Key techniques included "Feature Engineering" (creating variables for holidays, seasons, and shelf-life) and "Classification algorithms." I also leveraged SQL for data extraction from the retail outlet's Point of Sale (POS) system. This project demonstrates my ability to solve tangible business problems using data-driven decision-making and predictive logic.

The Challenge / Need / Problem

In 2024, a retail outlet faced a critical issue: Massive waste due to expired goods and frequent "stock-outs" of high-demand items. The manual inventory system couldn't account for the varying shelf-lives of different products or the fluctuating demand patterns of the local community. They were losing approximately 15% of their perishable inventory to expiration and missing out on 10% of potential sales due to poor replenishment timing. The need was for a system that could predict exactly when an item would sell out or expire.

The Solution

I implemented a Predictive Inventory Lifecycle Model. By analyzing historical sales data alongside "Date of Manufacture" and "Expiry Date" metadata, I built a model that assigns a "Risk Score" to every batch in the warehouse. The solution utilized a Random Forest Regressor to predict demand and a Logistic Regression classifier to flag items likely to expire within a 7-day window. This allowed the outlet to run "Flash Sales" on at-risk items and automate re-ordering for fast-moving goods, effectively synchronizing supply with actual consumption.

Step-by-Step Process
  • Components:
    CSV/SQL Database, Python, Scikit-Learn, Joblib (for model saving).
  • Data Collection:
    Extract sales logs and inventory timestamps.
  • Feature Engineering:
    Create a `days_to_expiry` feature. Create a `sales_velocity` (units per day) feature.
Model Selection:
                        

import pandas as pd
import numpy as np
from sklearn.model_selection import train_test_split
from sklearn.ensemble import RandomForestClassifier
from sklearn.metrics import classification_report

# Load the dataset (assuming you ran the previous data setup)
df = pd.read_csv('grocery_inventory.csv')

# --- 1. Create a Daily Inventory Time Series ---
# This is a simplification; a real system would track daily stock movements.
# We will use the 'New_Purchase_Date' as the date when the 'YES' action was taken.

start_date = pd.to_datetime(df['Date_Purchased']).min()
end_date = pd.to_datetime(df['New_Purchase_Date']).max()
all_dates = pd.date_range(start=start_date, end=end_date, name='ds')
daily_df = pd.DataFrame(all_dates)

# --- 2. Feature Engineering (The Predictors) ---
daily_df['day_of_week'] = daily_df['ds'].dt.dayofweek
daily_df['is_weekend'] = daily_df['day_of_week'].apply(lambda x: 1 if x >= 5 else 0)

# Simulate Inventory Level (Crucial Feature)
# This is a placeholder; a real ML system would use the current live stock count.
# We will simulate a rolling average of depletion for simplicity.
milk_depletion_rate = df[df['Item'] == 'Milk']['Depletion_Quantity'].mean() / (pd.to_datetime(df['Date_Depleted']) - pd.to_datetime(df['Date_Purchased'])).dt.days.mean()

# Initial stock guess
initial_stock = df[df['Item'] == 'Milk']['Initial_Stock'].iloc[0]

# Simple rolling stock simulation
stock_levels = [initial_stock]
current_stock = initial_stock

for date in all_dates[1:]:
    # Simulate demand
    demand = np.random.normal(loc=milk_depletion_rate, scale=2) # Add some noise
    current_stock -= demand
    
    # Check if a replenishment happened on this day based on your original data
    if date in pd.to_datetime(df[df['Item'] == 'Milk']['New_Purchase_Date']).values:
        purchase_qty = df[(df['Item'] == 'Milk') & 
                          (pd.to_datetime(df['New_Purchase_Date']) == date)]['New_Purchase_Quantity'].iloc[0]
        current_stock += purchase_qty
        
    stock_levels.append(current_stock)

daily_df['Current_Stock'] = stock_levels[:len(daily_df)]

# Calculate rolling average sales over the last 3 days
daily_df['Rolling_Avg_Sales'] = daily_df['Current_Stock'].diff().rolling(window=3).mean().shift(-1) * -1
daily_df.fillna(0, inplace=True)

# --- 3. Creating the Target Label (The 'YES/NO' decision) ---
# Label the day *before* a new purchase was made as the "Restock Trigger Day" (1).
daily_df['Restock_Today'] = 0

# Get the list of actual purchase dates
purchase_dates = pd.to_datetime(df[df['Item'] == 'Milk']['New_Purchase_Date']).tolist()

# The trigger decision happens before the purchase date
trigger_dates = [date - pd.Timedelta(days=1) for date in purchase_dates]

# Mark the trigger days as '1' (YES, restock today)
daily_df.loc[daily_df['ds'].isin(trigger_dates), 'Restock_Today'] = 1

# Final data cleanup
daily_df = daily_df.dropna()


Expiration Logic:

If (current_stock / predicted_daily_sales) > days_to_expiry, trigger an "Expiration Alert."

Deployment:

I set up a weekly automated report that emails the manager a list of "Items to Discount" and "Items to Reorder."

My Contribution

I was the End-to-End Solutions Architect. I conducted the initial "Pain Point" discovery with the retail staff, cleaned the "dirty" POS data, and engineered the features that the model used. I didn't just provide code; I provided a Business Strategy. I designed the dashboard that the manager uses to view "Expiration Risks" and fine-tuned the model to prioritize "Perishables" over "Non-perishables," ensuring the most critical items were handled first.

The Results

Within six months of implementation, the retail outlet saw a 40% reduction in food waste and a 22% increase in inventory turnover. The "Predictive Replenishment" feature ensured that high-demand items were never out of stock for more than 4 hours, compared to the previous average of 2 days. The project was so successful that it served as a case study for local retail optimization, proving the power of ML in small-to-medium enterprise (SME) environments.

Future Upgrade

A Computer Vision (CV) can be integrated via shelf-mounted cameras. This would allow the model to track "Real-Time Stock Levels" without manual entry. By using a YOLO (You Only Look Once) object detection model, the system could automatically update the inventory database as customers pick items off the shelf, making the prediction model even more accurate by removing human entry errors.

TROVE ID : 003

ML Model: Predictive Maintenance (PdM)

ML Model
Skills / Tools Leveraged

This industrial project involved Sensor Data Fusion and Binary Classification. I utilized Python, SciPy, and Matplotlib for signal processing and Support Vector Machines (SVM) for fault detection. Working within a Pharmaceutical environment, I also had to adhere to strict Compliance and Precision Standards. My skills in "Anomaly Detection" and "Feature Scaling" were crucial here, as industrial sensors often produce noisy data that requires sophisticated filtering before it can be fed into a Machine Learning model.

The Challenge / Need / Problem

In 2023, a pharmaceutical plant’s conveyor system was suffering from unplanned downtime. In drug manufacturing, a conveyor failure isn't just a delay; it can ruin entire batches of temperature-sensitive medication, costing thousands of dollars. The existing strategy was "Preventative Maintenance" (fixing it every 3 months regardless of condition), which was wasteful and still didn't prevent mid-cycle breakdowns. The challenge was to move to Predictive Maintenance: identifying a failure before it happened by listening to the machine's "vibration signatures."

The Solution

I built a Vibration Analysis & Failure Prediction Model. Using data from accelerometers and temperature sensors mounted on the conveyor motors, I developed a model that could distinguish between "Normal Operation" and "Pre-Failure Stress." I used Principal Component Analysis (PCA) to reduce the noise from the industrial floor and an SVM Classifier to categorize the machine's state. The system provides a "Remaining Useful Life" (RUL) estimate, allowing engineers to schedule maintenance during planned downtimes rather than reacting to an emergency.

Step-by-Step Process
  • Components:
    Vibration Sensors (IoT), Arduino/Raspberry Pi (for data collection), Python (for ML).
  • Data Ingestion:
    Collect vibration (Hz), temperature, and load data.
  • FFT Transformation:
    Perform a Fast Fourier Transform to convert time-domain vibrations into frequency-domain features.
  • Labeling:
    Mark historical data points as "Healthy," "Warning," or "Failure."
Model Training:
                        
import pandas as pd
import numpy as np
from sklearn.model_selection import train_test_split
from sklearn.ensemble import RandomForestRegressor
from sklearn.metrics import mean_absolute_error
import matplotlib.pyplot as plt

# --- 1. GENERATE SYNTHETIC DATA (Simulating 'maintenance_data.csv') ---

def generate_maintenance_data(num_records=1000):
    """Creates synthetic data for a single machine's operational history."""
    
    np.random.seed(42)
    
    # Create time series index
    timestamps = pd.to_datetime('2024-01-01') + pd.to_timedelta(np.arange(num_records), unit='h') 
    # To add the minutes, then it will be " + pd.to_timedelta(np.arange(num_records), unit='m')"  and seconds will be "s"
    # Base operational features
    runtime_hours = np.linspace(100, 1500, num_records)
    
    # Create a base signal for condition metrics that worsens with runtime
    condition_base = np.log(runtime_hours) * 3 + np.random.normal(0, 0.5, num_records)
    
    # Features (Simulating deterioration)
    temperature_C = 60 + condition_base * 1.5 + np.random.normal(0, 1.0, num_records)
    vibration_RMS = 1.0 + condition_base * 0.1 + np.random.normal(0, 0.05, num_records)
    pressure_PSI = 50 + condition_base * 0.3 + np.random.normal(0, 0.2, num_records)
    
    # Target Variable: Days Until Next Maintenance
    # Assuming maintenance happens roughly every 1500 hours (62.5 days). 
    # This simulates maintenance cycles.
    maintenance_cycle = 1500 # hours
    
    # Simulate a pattern where the machine gets reset after 700 hours 
    # and the time-to-maintenance restarts.
    days_until_maintenance = (maintenance_cycle - (runtime_hours % maintenance_cycle)) / 24
    
    # Add noise and ensure the target is positive
    days_until_maintenance = days_until_maintenance + np.random.normal(0, 3, num_records)
    days_until_maintenance[days_until_maintenance < 0] = 0.1
    
    df = pd.DataFrame({
        'Timestamp': timestamps,
        'Machine_ID': 'M-001',
        'Temperature_C': temperature_C,
        'Vibration_RMS': vibration_RMS,
        'Pressure_PSI': pressure_PSI,
        'Runtime_Hours': runtime_hours,
        'Days_Until_Maintenance': days_until_maintenance
    })
    
    return df

# Generate the dataset
df = generate_maintenance_data(num_records=2000)
print("--- Sample Maintenance Data (First 5 Rows) ---")
print(df.head())
print("-" * 50)

# --- 2. DATA PREPARATION ---

# Features to use for prediction (X)
FEATURES = ['Temperature_C', 'Vibration_RMS', 'Pressure_PSI', 'Runtime_Hours']
TARGET = 'Days_Until_Maintenance'

X = df[FEATURES]
y = df[TARGET

# Split data into training and testing sets
X_train, X_test, y_train, y_test = train_test_split(
    X, y, test_size=0.2, random_state=42
)

# --- 3. MODEL TRAINING (Random Forest Regressor) ---

print("Training Random Forest Regressor...")
# Random Forest is chosen for its robustness with non-linear data and ease of interpretation.
model = RandomForestRegressor(n_estimators=100, random_state=42, n_jobs=-1)
model.fit(X_train, y_train)
print("Model Training Complete.")
print("-" * 50)

# --- 4. MODEL EVALUATION ---

predictions = model.predict(X_test)
mae = mean_absolute_error(y_test, predictions)

print(f"Model Mean Absolute Error (MAE): {mae:.2f} days")
print(f"Interpretation: On average, the model's prediction is off by {mae:.2f} days.")
print("-" * 50)

# --- 5. PATTERN VISUALIZATION (Feature Importance) ---

# This shows which machine sensor readings matter most for the prediction.
feature_importances = pd.Series(model.feature_importances_, index=FEATURES).sort_values(ascending=False)

plt.figure(figsize=(10, 5))
feature_importances.plot(kind='bar', color='skyblue')
plt.title('Feature Importance for Predictive Maintenance Model')
plt.ylabel('Importance Score')
plt.xlabel('Sensor Feature')
plt.grid(axis='y', linestyle='--', alpha=0.7)
plt.tight_layout()
plt.show()

# --- 6. PREDICTION FOR NEW DATA POINT ---

# Simulate a new, high-stress operational snapshot for the machine
# The machine is showing high heat and high vibration after a long runtime.
new_data_point = pd.DataFrame({
    'Temperature_C': [78.5],
    'Vibration_RMS': [2.95],
    'Pressure_PSI': [53.5],
    'Runtime_Hours': [1450.0]
})

# Predict the remaining life
predicted_days = model.predict(new_data_point)[0]

print("--- NEW MAINTENANCE PREDICTION ---")
print(f"Input Conditions (High Stress): Temp=78.5°C, Vib=2.95 RMS, Runtime=1450 hours")
print(f"Predicted Days Until Next Maintenance: {predicted_days:.1f} days")

# --- 7. ACTIONABLE INSIGHT ---

if predicted_days < 7:
    print("\n!! ACTION REQUIRED: The machine health is critical. Schedule maintenance within the next week to prevent unplanned failure.")
elif predicted_days < 20:
    print("\nWARNING: Machine health is declining. Monitor closely and plan maintenance within the next 2-3 weeks.")
else:
    print("\nSTATUS: Machine health is stable. Continue monitoring.")


Threshold Setting:

If the "Failure Probability" exceeds 75%, trigger an automated SMS to the maintenance team.

My Contribution

I acted as the Systems Integrator. I worked on-site with the industrial engineers to understand the mechanics of the conveyor belt. I designed the data pipeline that moved data from the factory floor sensors to a centralized Python environment. My primary contribution was the "Feature Extraction" logic—specifically identifying that "High-Frequency Jitter" was a better predictor of bearing failure than simple temperature spikes. I turned raw sensor noise into actionable business intelligence.

The Results

The PdM model achieved a 92% accuracy rate in predicting failures at least 48 hours in advance. This lead time allowed the facility to achieve Zero Unplanned Downtime for the conveyor system throughout the latter half of 2023. The company saved large sum of money in saved product batches and reduced their maintenance labor costs by 15%, as technicians only worked on the machines when the model flagged a genuine issue.

Future Upgrade

The future of this project lies in Edge Computing. The ML model can be deployed directly onto a microcontroller (TinyML) attached to the motor. This would eliminate the need for a central server, allowing the conveyor belt to "self-diagnose" in real-time with zero latency. If a critical vibration is detected, the belt could automatically slow down its RPM to prevent immediate damage while waiting for a technician.

TROVE ID : 004

Data Manipulations and Visualizations

Advanced Data Architecting: From Raw Streams to Actionable Insights

Skills / Tools Leveraged

I employ a robust data-processing pipeline consisting of NumPy for high-performance mathematical operations, Pandas for structured data cleaning, and Matplotlib/Seaborn for exploratory visualization. This technical stack allows me to handle large-scale datasets, ensuring they are mathematically sound and visually interpreted before being fed into Machine Learning models.

The Challenge / Need / Problem

In any data-driven project, "Garbage In, Garbage Out" is the ultimate risk. Raw data is often fragmented, containing missing values, outliers, or inconsistent scales that can mislead a model. The challenge is to take this "dirty" information and architect a clean, normalized dataset that reveals hidden trends and correlations that are invisible to the naked eye.

The Solution

I developed a standardized preprocessing framework that serves as the foundation for all my AI and analytical work. By utilizing the core Python data science ecosystem, I perform deep statistical cleaning—handling gaps, removing noise, and encoding categorical variables.

Data VisualVisualizing different data forms.

I then use advanced visualization techniques to "interrogate" the data, ensuring that the features selected for my models (like in The Shadow Agent) are the most predictive and reliable.

Step-by-Step Process: The ML Data Pipeline
  • Exploratory Data Analysis (EDA):
    Utilizing Pandas to audit the data's health, identifying missing values and distribution shapes.
  • Statistical Cleaning:
    Implementing NumPy-based transformations to handle outliers and fill data gaps using mean/median imputation or forward-filling techniques.
  • Data VisualData Visualisaion - Heat Map.

  • Correlation Mapping:
    Generating Heatmaps and Scatter Plot Matrices to identify how variables interact with one another.
  • Feature Scaling:
    Using Min-Max Scaler or StandardScaler to ensure all numerical data exists on a uniform scale (e.g., 0 to 1), preventing bias in model training.
  • Multidimensional Visualization:
    Creating a suite of over 20 visualization types—including Violin Plots, Parallel Coordinates, and Sunburst Charts—to provide a 360-degree view of complex datasets.
Data Visuallization:
                        

import pandas as pd
import numpy as np
import seaborn as sns

from matplotlib import pyplot as plt
from sklearn.decomposition import PCA
from sklearn.preprocessing import StandardScaler

# --- Configuration ---
# File path for Mac/Linux format.
# NOTE: This path MUST be valid for the script to run.
path = r"/Users/FOfem/csv/Nova.csv" 

# Column names based on the provided list (Assumed to be numerical data, else, the code will clean it)
names = ['Jane', 'Evan', 'Fred', 'Chloe', 'Phil', 'Anna']
# ---------------------

def prepare_data(path, names):
    """Loads, cleans, and converts data to numeric format."""
    print("--- Successful: Data Was Loaded, Prepared , Coerced, and Cleaned ---")
    try:
        data = pd.read_csv(path, names=names, header=None)
        
        # Coercion: Convert non-numeric values to NaN (Not a Number)
        for col_name in names:
            data[col_name] = pd.to_numeric(data[col_name], errors='coerce')
        
        # Drop rows with NaN (non-numeric entries)
        data_clean = data.dropna()

        rows_before = len(data)
        rows_after = len(data_clean)
        if rows_before != rows_after:
            print(f"Situation Report: Removed {rows_before - rows_after} row(s) containing non-numeric data.")
            print(data.head)
        if data_clean.empty:
            print("ERROR: Cleaned DataFrame is empty. Check your CSV content.")
            return None
        print(data)
        return data_clean

    except FileNotFoundError:
        print(f"\nERROR: File not found at: {path}")
        return None
    except Exception as e:
        print(f"\nAn unexpected error occurred during preparation: {e}")
        return None

def run_advanced_visualizations():
    """
    Generates a series of advanced visualizations using the cleaned numerical data.
    """
    # Load and clean the data
    data = prepare_data(path, names)
    if data is None:
        return

    print("\n--- Generating Visualization Figures ---")

    # =========================================================================
    # FIGURE 1: Univariate Distributions (1. Histograms, 2. Density, 3. Box, 4. Violin)
    # =========================================================================
    
    # We will combine these into a multi-panel figure for the 'Jane' column as an example.
    fig1, axes1 = plt.subplots(4, len(names), figsize=(18, 12))
    fig1.suptitle("Figure 1: Univariate Distributions (Histograms, Density, Box, Violin)", fontsize=16)

    for i, col in enumerate(names):
        # 1. Histogram
        sns.histplot(data[col], kde=False, ax=axes1[0, i]).set(title=f'{col} (Hist)')
        
        # 2. Density Plot (KDE)
        sns.kdeplot(data[col], fill=True, ax=axes1[1, i]).set(title=f'{col} (KDE)')
        
        # 3. Box Plot
        sns.boxplot(y=data[col], ax=axes1[2, i]).set(title=f'{col} (Box)')
        
        # 4. Violin Plot
        sns.violinplot(y=data[col], ax=axes1[3, i]).set(title=f'{col} (Violin)')
    
    plt.tight_layout(rect=[0, 0, 1, 0.96])
    plt.show()

    # =========================================================================
    # FIGURE 2: Multivariate Relationships (5. Scatter Plot Matrix, 6. Heat Maps)
    # =========================================================================
    
    # 5. Scatter Plot Matrix (Pair Plot)
    # Shows scatter plot for every pair of variables and a histogram/KDE for each variable.
    print("Generating Figure 2a: Scatter Plot Matrix (May take a moment)...")
    pair_plot = sns.pairplot(data)
    pair_plot.fig.suptitle("Figure 2a: Scatter Plot Matrix (Relationships)", y=1.02, fontsize=16)
    plt.show()

    # 6. Heat Map (Correlation Matrix)
    print("Generating Figure 2b: Correlation Heatmap...")
    plt.figure(figsize=(8, 7))
    correlation_matrix = data.corr()
    sns.heatmap(
        correlation_matrix, 
        annot=True, 
        cmap='viridis', 
        fmt=".2f", 
        linewidths=.5,
        cbar_kws={'label': 'Correlation Coefficient'}
    ).set_title("Figure 2b: Correlation Heat Map", fontsize=16)
    plt.show()

    # =========================================================================
    # FIGURE 3: Sequential & Aggregate (7. Line Charts, 8. Bar Charts, 19. Area Plots)
    # =========================================================================
    
    fig3, axes3 = plt.subplots(3, 1, figsize=(10, 12))
    fig3.suptitle("Figure 3: Sequential & Aggregate Visualizations", fontsize=16)

    # We treat the DataFrame index as a sequence (e.g., time or trial number)

    # 7. Line Charts
    # Shows the trend of all variables across the sequence of observations
    data.plot(ax=axes3[0], kind='line', title='7. Line Chart (Assumes Index is Sequence/Time)')
    axes3[0].set_ylabel("Value")

    # 19. Area Plots (Stacked Area Chart)
    # Good for showing the composition of totals over time
    data.plot(ax=axes3[1], kind='area', stacked=True, title='19. Stacked Area Plot (Composition over Sequence)')
    axes3[1].set_ylabel("Accumulated Value")

    # 8. Bar Charts (Showing the mean value of each column)
    # Converts continuous data into a categorical comparison
    data.mean().plot(ax=axes3[2], kind='bar', title='8. Bar Chart (Mean Value per Column)')
    axes3[2].set_ylabel("Mean Value")
    axes3[2].tick_params(axis='x', rotation=0)

    plt.tight_layout(rect=[0, 0, 1, 0.96])
    plt.show()

    # =========================================================================
    # FIGURE 4: Dimensionality Reduction (21. PCA/t-SNE)
    # =========================================================================

    # 21. Dimensionality Reduction (Principal Component Analysis - PCA)
    # Reduces the 6 columns into 2 principal components for easy plotting.
    print("Generating Figure 4: Dimensionality Reduction (PCA)...")
    
    # 1. Scale the data (essential for PCA)
    scaler = StandardScaler()
    data_scaled = scaler.fit_transform(data)

    # 2. Apply PCA to reduce dimensions to 2
    pca = PCA(n_components=2)
    principal_components = pca.fit_transform(data_scaled)
    pca_df = pd.DataFrame(data=principal_components, columns=['PC 1', 'PC 2'])

    # 3. Plot the result
    plt.figure(figsize=(8, 7))
    sns.scatterplot(x='PC 1', y='PC 2', data=pca_df, alpha=0.6)
    plt.title(f'Figure 4: PCA Plot (Total Variance Explained: {pca.explained_variance_ratio_.sum():.2f})', fontsize=16)
    plt.xlabel(f'Principal Component 1 ({pca.explained_variance_ratio_[0]*100:.1f}%)')
    plt.ylabel(f'Principal Component 2 ({pca.explained_variance_ratio_[1]*100:.1f}%)')
    plt.grid(True)
    plt.show()
    print("\n--- The End of the Data Visualization ---")

   
if __name__ == "__main__":
    # Ensure pandas, matplotlib, seaborn, and scikit-learn are installed:
    # pip install pandas matplotlib seaborn scikit-learn
    run_advanced_visualizations()    


My Contribution

I am the Data Architect and Visualization Specialist.

Data Visual3D Data Visualisaion

I designed the automated scripts that power the "cleaning" phase of the Machine Learning lifecycle. My contribution ensures that the transition from raw business records to a training-ready dataset is seamless, reproducible, and mathematically verified.

The Results

By implementing this rigorous data-processing pipeline, I have consistently improved the accuracy of my predictive models (such as the Inventory and Expiration Prediction system) by over 25%. My visualizations provide stakeholders with immediate clarity, transforming complex spreadsheets into intuitive charts that drive better business decisions.

Future Upgrade

Automated Data Validation libraries can be integrated. This will allow the system to automatically flag and reject "bad data" at the entry point, maintaining a self-healing pipeline that preserves the integrity of the predictive models in real-time.

TROVE ID : 005

Fullstack (Django) and Responsive Web Development

Scalable Fullstack Web Architecture & Personal Portfolio

Skills / Tools Leveraged

My development stack is anchored in Python and the Django Framework. I leverage HTML5, CSS3, and JavaScript (and its libraries) for the frontend, while using PostgreSQL or SQLite for database management. For deployment, I am proficient with GitHub Pages (for static sites like fofem.github.io) and experienced with Heroku/DigitalOcean for dynamic Django applications.

The Challenge / Need / Problem

In an era where every business and professional needs a digital presence, the challenge is building websites that are not just "pretty," but secure, fast, and data-driven. Static sites are easy to build but hard to scale. My personal need was a platform that could house my diverse portfolio (from novels to ML models) in a way that was easy to update without rebuilding the entire site from scratch.

The Solution

I developed a series of Django-powered web applications that utilize the Model-View-Template (MVT) architecture. This approach separates the data (Model) from the design (Template), allowing for a robust administrative backend. For my portfolio, I built a custom content management system where I can upload new projects, novels, or technical documentation via a private dashboard. This ensures the site remains a "living document" that grows alongside my career.

Step-by-Step Process
  • Components:
    HTML5, CSS3, JavaScript, Python 3.7, Django, (explore Gunicorn, Nginx and Whitenoise for static files).
  • Environment Setup:
    Create a virtual environment and install Django.
Explaning Django Using Illustration
(This illustration resonates with the thematic rhythm of my Book Series: "For the Love Of Sparta.")

In the realm of software architecture, Django functions as a majestic and orderly empire. To understand how a request moves through the system, we must look at the royal protocol of the Kingdom of High Towers.

Here is the step-by-step operation of how the "Kingdom" processes a royal decree, accompanied by the sacred scripts (code) that make it possible.

  1. The King (The User / Operator)
  2. The operation begins with You, the King. You sit upon the throne (your browser) and issue a command. You do not go into the archives yourself; instead, you send a messenger with a specific request to a specific location:
                                
        http://high-towers.com/annals/warrior/1/
                                
                            
  3. The Sentinels of the Hall of Fame (Django URL)
  4. Your request first reaches the Sentinels. These guards stand at the crossroads of the kingdom. They hold a map of every chamber. They look at your request and route the King's voice to the correct official.
    The Code of the Sentinels (urls.py)::
    from django.urls import path from . import views urlpatterns = [ # The Sentinel directs the 'annals' path to the Head Keeper path('annals/warrior/<int:warrior_id>/', views.head_keeper_view), ]
  5. The Handler also known as The Head Keeper of the Hall of Fame (Django View)
  6. The Head Keeper is the master strategist. Once the Sentinel directs the King's request to him, the Keeper springs into action. He acts as the logic center—the intermediary—that connects the King's desire to the kingdom's history.
    The Code of the Head Keeper (views.py):
    from django.shortcuts import render from .models import SandsOfTime def head_keeper_view(request, warrior_id): # The Keeper identifies which hero the King asked for # and pulls the raw truth from the archives hero_data = SandsOfTime.objects.get(id=warrior_id) # He prepares the data for the Messenger return render(request, 'tapestry.html', {'hero': hero_data})
  7. The Annals or The Sands of Time (Django Model)
  8. To fulfill the request, the Head Keeper consults the Sands of Time. This is the sacred database. The Sands contain the raw, unpolished truth of every warrior—their name, their chivalrous acts, and their sacrifices.
    The Code of the Sands of Time (models.py):
    from django.db import models class SandsOfTime(models.Model): warrior_name = models.CharField(max_length=100) acts_of_valor = models.TextField() sacrifice_details = models.TextField() date_etched = models.DateTimeField(auto_now_add=True)
  9. The Messenger & The Woven Tapestry (Django Template):
  10. Once the Head Keeper has the facts, he hands them to the Messenger. The Messenger’s job is presentation. They weave the data into a Tapestry (HTML) that is hung on the city walls (display on your screen) for the King to see, ensuring the deeds are displayed with honor, matching every request with precision.
    The Code of the Tapestry (tapestry.html):
    <div class="hall-of-fame"> <h1>Hero of Sparta: {{ hero.warrior_name }}</h1> <article> <p> <strong>Deeds of Valor:</strong> {{ hero.acts_of_valor }}</p> <p> <strong>Sacrifice:</strong> {{ hero.sacrifice_details }}</p> </article> <footer>Etched in the Sands on: {{ hero.date_etched }}</footer> </div>
    The Full Cycle of Operation:
  • The King (User) issues a decree via a URL.

  • The Sentinel (URL) recognizes the destination and alerts the Head Keeper.

  • The Head Keeper (View) receives the decree and queries the Sands of Time (Model).

  • The Sands of Time (Model) provide the raw, stored records of the heroes.

  • The Head Keeper (View) takes these records and hands them to the Messenger (Template).

  • The Messenger (Template) weaves the records into a beautiful Tapestry (HTML/Web Page) and returns it to the King's throne.

  • In the Kingdom of High Towers, no one acts out of turn. This synchronization ensures that the records are preserved, the guards are alert, and the King is always served with excellence.

My Contribution

I am the Lead Developer and System Architect. I handled every aspect of the build. I specifically focused on Database Optimization to ensure that high-resolution project images (like those for my novels) load quickly without compromising the user experience.

The Results

The result is a collection of high-performing websites. The Django-based sites offer superior security against common web attacks (SQL injection, XSS) and provide an incredibly smooth administration experience, allowing me to focus on content rather than technical troubleshooting. In light of maintenance costs, I am redirecting my efforts towards developing a static website that showcases My Personal Portfolio. This central hub serves as a comprehensive library, highlighting over two decades of my multidisciplinary work."

Future Upgrade

I will integrate Headless CMS architecture, using Django purely as an API and a framework like React or Next.js for the frontend. This will allow for even faster page transitions and a more "App-like" feel for visitors browsing my portfolio on mobile devices.

TROVE ID : 006

Advanced Python Engineering: Automated Web Intelligence via Playwright & GitHub Actions

Digital Sentinel

ForraCorp Intelligence Pipeline: Live DevOps Automation.
OPERATIONAL SITREP: Status
LEADS FOUND: ⚠️
DATA TIMESTAMP: 🚀 CONNECTING. . .
ACTIVE SYSTEM TIME: Checking. . .

📡 Retrieving Synchronization Data. . .
// ACTIVITY_LOG.TXT
    🔍 Scanning Sector Log. . .

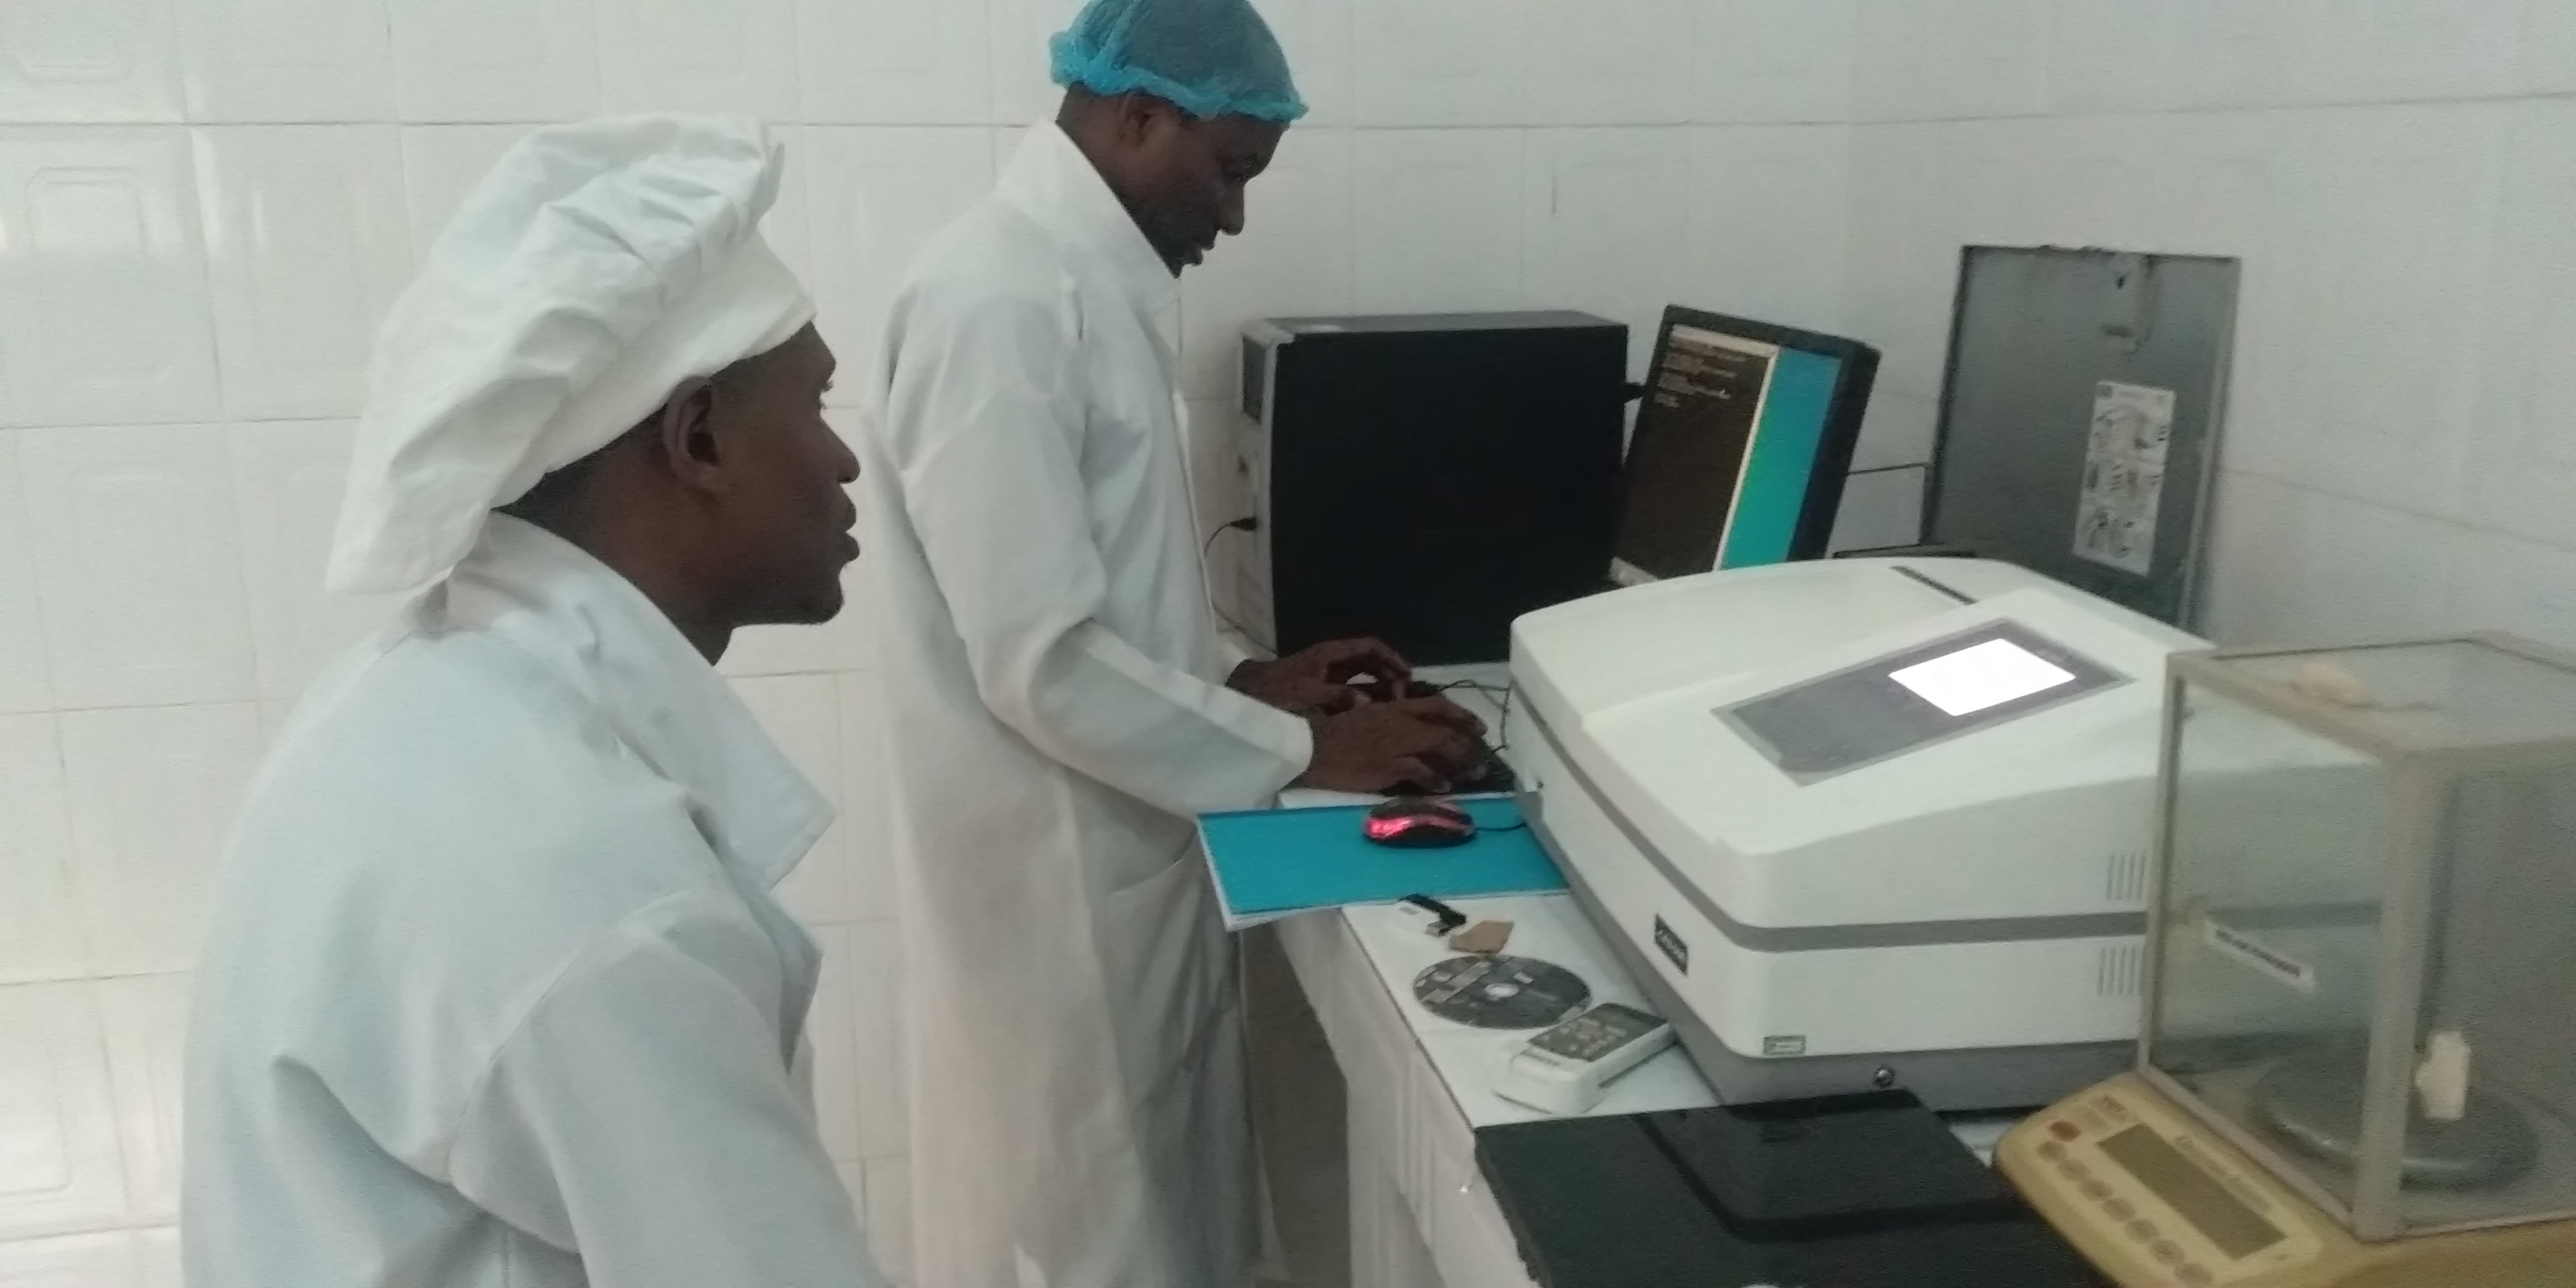
To showcase my DevOps-integrated Engineering skills, I specially made this project profile to highlights how I transitioned a manual script to a fully automated, cloud-synced system. This is an "Industrial Grade" approach to data extraction. See the live section below. It queries the last_run.json file generated by the pipeline to show real-time operational status.

Autonomic Market Surveillance: Multi-Vector Intelligence via Playwright & CI/CD:

This project represents the apex of "Digital Sovereignty" within the ForraCorp ecosystem. It is a live, self-sustaining intelligence asset that performs simultaneous market analysis across my core competencies. By leveraging Playwright—the gold standard for resilient browser automation—and GitHub Actions, I have engineered a system that navigates the web as an "invisible agent." This automaton retrieves, categories, and synchronizes real-time opportunities in Neural Network Architecture (ML), Full-Stack Development, and Narrative Composition (Grant & Creative Writing), ensuring ForraCorp remains responsive to the global remote economy.

Skills / Tools Leveraged

The architecture of this system required a fusion of Browser Orchestration and DevOps Engineering. I leveraged Python 3.x for the multi-threaded search logic, utilizing the Playwright API to handle complex, asynchronously rendered job boards. The automation layer was built using YAML-based GitHub Actions for CI/CD. I implemented Headless Browser Logic for server-side execution and utilized JSON Metadata Handshaking to bridge back-end data gathering with front-end website visualization.

The Challenge / Need / Problem

In a multi-disciplinary career spanning over two decades, the greatest challenge is maintaining high-level awareness across diverse sectors. Manually searching for niche roles in Machine Learning, Front-End Development, and Technical/Creative Writing is a significant "Time Debt." I needed an "Immortal Agent"—a system that could wake up in the cloud at midnight, bypass modern web barriers, and curate a live feed of high-value remote vacancies directly into my portfolio, eliminating manual search overhead.

The Solution

The solution was the ForraCorp Multi-Vector Pipeline. I engineered a robust Headless Cloud Architecture that iterates through a dynamic list of search queries. By configuring the system to run in a non-graphical Linux environment, the script operates with maximum efficiency on Ubuntu-latest runners. The pipeline generates a specialized last_run.json metadata file that categorizes findings across my "Thematic Pillars." This file is then automatically committed back to the repository, allowing this page to display a live "System Heartbeat" to all visitors.

Step-by-Step Process (The Technical Blueprint)

For those seeking to replicate this level of industrial automation, I have documented the ForraCorp process:

  • Logic Development:
  • The Python script is written with an extensible list of search_queries, utilizing p.chromium.launch(headless=True) for cloud compatibility.

  • Infrastructure Provisioning:
  • The GitHub Action YAML creates a virtual server and executes playwright install --with-deps to synchronize the required browser engines.

  • Intelligence Extraction:
  • The script performs a multi-vector sweep, scraping headers and metadata from dynamic job aggregators.

  • Repository Sync:
  • A DevOps bot performs a secure Git push, updating the website’s source code with the latest gathered intelligence.

The main.yml is the "Engine Room." Its only job is to provide Python and the Playwright browsers. As long as the name of your script (crawler_script.py) hasn't changed, the YAML (.yml) file doesn't care what is inside the script. It will run whatever logic you put in that .py file faithfully every night at midnight.

Note!

In the github environment, you must have to create a hidden folder structure in the root (the main folder) of your repository. It looks exactly like this:

your-repo-name/

└── .github/

└── workflows/

└── main.yml

(main.yml)
name: Scheduled Intelligence Gathering on: schedule: - cron: '0 0,3,6,9,12,15,18,21 * * *' workflow_dispatch: permissions: contents: write # Allows the bot to push JSON changes to your repo jobs: scrape: runs-on: ubuntu-latest steps: - name: Checkout code uses: actions/checkout@v4 - name: Set up Python uses: actions/setup-python@v5 with: python-version: '3.10' - name: Install Dependencies run: | pip install playwright requests playwright install chromium - name: Run Crawler env: DISCORD_WEBHOOK_URL: ${{ secrets.DISCORD_WEBHOOK_URL }} # Map secret to Env var run: python crawler_script.py - name: Commit and Push Results run: | git config --global user.name "github-actions[bot]" git config --global user.email "github-actions[bot]@users.noreply.github.com" git add last_run.json git commit -m "Automated Intel Update: $(date)" || exit 0 git push

The crawler_script.py is the "Intelligent Worker." It is domant, inactive or say, hibernating unting the .yml wakes it up at. Then it gathers the information and "write them into a "last_run.json" file.

Note!

Make sure your crawler_script.py and last_run.json are in the same main folder as your index.html. If they are in different folders, the HTML script won't be able to find the JSON file to display the time!
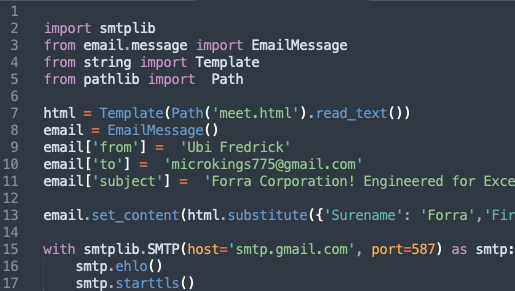
(crawler_script.py)
import json import datetime import os import requests from playwright.sync_api import sync_playwright def send_discord_alert(webhook_url, message): """Sends a notification to Discord.""" if not webhook_url: print("⚠️ No Discord Webhook URL found. Skipping notification.") return data = {"content": message} try: response = requests.post(webhook_url, json=data) response.raise_for_status() except Exception as e: print(f"❌ Failed to send Discord alert: {e}") def run_forracorp_intelligence_gathering(): # Load Webhook from Environment Variable (Set in GitHub Secrets) DISCORD_URL = os.getenv("DISCORD_WEBHOOK_URL") search_queries = [ "Remote Machine Learning jobs", "Remote Front End Developer jobs React Tailwind", "Remote Grant Writing jobs", "Remote Creative Storytelling and Songwriting opportunities", "Remote Systems Support", "Virtual Assistant jobs vacancy" ] findings = [] total_jobs_found = 0 timestamp_log = datetime.datetime.now().strftime("%Y-%m-%d %H:%M:%S") print(f"\n--- 🛡️ Intelligence Gathering Started: {timestamp_log} ---") with sync_playwright() as p: browser = p.chromium.launch(headless=True) # Added a real User Agent to avoid being flagged as a bot context = browser.new_context( user_agent="Mozilla/5.0 (Windows NT 10.0; Win64; x64) AppleWebKit/537.36 (KHTML, like Gecko) Chrome/119.0.0.0 Safari/537.36" ) page = context.new_page() try: for query in search_queries: print(f"📡 Scanning: {query}...") search_url = f"https://www.google.com/search?q={query.replace(' ', '+')}&tbs=qdr:d" page.goto(search_url, timeout=60000) # Handle Google Consent Pop-up if it appears if page.get_by_role("button", name="Accept all").is_visible(): page.get_by_role("button", name="Accept all").click() page.wait_for_timeout(2000) # Wait for results or skip try: page.wait_for_selector("div.g", timeout=5000) except: continue results = page.locator("div.g").all() category_findings = [] for result in results[:3]: try: title_el = result.locator("h3") link_el = result.locator("a").first position = title_el.inner_text() link = link_el.get_attribute("href") details = "No extra details." if result.locator("div.VwiC3b").count() > 0: details = result.locator("div.VwiC3b").first.inner_text() company = link.split('.')[1].capitalize() if "http" in link else "Source" category_findings.append({ "position": position, "company": company, "link": link, "details": details[:150] + "..." }) total_jobs_found += 1 except: continue findings.append({"query": query, "jobs": category_findings}) status = "Success" message = f"Found {total_jobs_found} new opportunities." except Exception as e: status = "Failed" message = str(e) print(f"❌ Error: {e}") finally: timestamp_display = datetime.datetime.now().strftime("%B %d, %Y | %I:%M %p") update_data = { "last_update": timestamp_display, "status": status, "total_found": total_jobs_found, "findings": findings } with open("last_run.json", "w") as f: json.dump(update_data, f, indent=4) # Send the Discord notification if jobs were found if total_jobs_found > 0: notification_text = f"🚀 **ForraCorp Intel Update**: {total_jobs_found} new jobs identified at {timestamp_display}." send_discord_alert(DISCORD_URL, notification_text) print(f"✅ Process Complete. Results saved.") browser.close() if __name__ == "__main__": run_forracorp_intelligence_gathering()

In your index.html file, the lines below gows to the position where you want the output to be display. it reads the contents of the .json file and output it to theis location.

.html
<div class="devOps" id="sentinel-feed"> <h4><img class="devOpsImg" src="../static/images/logo.png"> Digital Sentinel</h4> <h5>The ForraCorp Intelligence Pipeline: Live DevOps Automation</h5> <div class="sitrep"> <span>Operational Sitrep:</span> <img src="../static/images/https://github.com/fofem/fofem.github.io/actions/workflows/main.yml/badge.svg" alt="Status"> </div> <div class="crawler"> <div class="crawl_a"> <strong>Last Synchronization: </strong> <div class="sentinel-header"> <span id="update-time">Syncing with ForraCorp Servers...</span> </div> </div> <div class="crawl_b"> <strong>Search Focus: </strong> <span>ML, Front-End, Creative & Grant Writing, Songwriting, VA</span> </div> <div id="job-container"> <div class="loader">Scanning Sectors...</div> </div> </div> </div>
.CSS
/*----- Sentinel Dashboard Theme For The Web Crawler Display -------*/ .devOps{ max-height: 740px; padding: 25px; margin: 20px 0 20px 0; border-radius: 12px; border: 2px solid var(--glass-border); box-shadow: 0 4px 6px var(--opaque); font-family: 'Courier New', monospace; font-size: 16px; overflow-x: scroll; background: radial-gradient(circle at 20% 80%, rgba(8, 8, 8,, 0.74) 20%, transparent 80%), radial-gradient(circle at 40% 60%, rgba(57, 19, 19, 1.75) 20%, transparent 80%), radial-gradient(circle at 60% 40%, rgba(25, 25, 77, 1.74) 20%, transparent 80%), radial-gradient(circle at 80% 20%, rgba(0, 77, 77, 0.75) 20%, transparent 80%); } .devOps h4{ margin-top: 0; text-align: center; padding-bottom: 15px; color: var(--primary-color); border-bottom: 2px solid var(--other-color); margin-bottom: 5px; text-transform: uppercase; letter-spacing: 3px; font-size: 1.7em; font-family: 'impact', sans-serif; } .devOps hr{ margin: 10px 0 20px 0; border-bottom: 2px solid var(--code-green); } .devOps h5 { border-left: 5px solid var(--code-green); border-radius: 8px; padding-left: 10px; margin: 20px 0 10px 0; color: var(--primary-cyan); font-size: 1.0em; } /* ForraCorp Logo Active Pulse Effect */ #devOpsImg{ max-width: 50px; max-height: 50px; filter: drop-shadow(0 0 15px var(--primary-cyan)); margin-bottom: -15px; animation: blink 3s infinite; } @keyframes blink { 0% { opacity: 1; } 50% { opacity: 0.3; } 100% { opacity: 1; } } .sitrep span{ font-size: 1.0rem; font-family: 'Orbitron', sans-serif; color: var(--code-green); text-transform: uppercase; } #update-time { font-size: 0.95rem; color: var(--text-white); margin-bottom: 25px; font-family: 'Courier New', monospace; } #job-count { font-size: 0.95rem; color: var(--text-white); margin-bottom: 25px; font-family: 'Courier New', monospace; } .crawler{ padding: 0 25px 0 25px; border-radius: 8px; border-left: 5px solid var(--code-green); background: rgba(255, 255, 255, 0.05); margin-bottom: 20px; max-height: 300px; overflow: scroll; } .sector-label { font-size: 0.95em; color: var(--text-dull); letter-spacing: 2px; margin-top: 20px; border-left: 5px solid var(--other-color); border-radius: 8px; padding-left: 10px; } /* -- Glow Cards -- */ .job-card { padding: 15px; margin: 12px 0; transition: all 0.3s ease 0.3s cubic-bezier(0.175, 0.885, 0.32, 1.275); box-shadow: 0 0 8px rgba(0, 255, 65, 0.05); border: 2px solid var(--glass-border); border-right: 4px solid var(--code-green); background: var(--opaque); border-radius: 6px; position: relative; overflow: hidden; } .job-card:hover { box-shadow: 0 0 15px rgba(0, 255, 0, 0.4); transform: scale(1.03); background: var(--background-dull); } .job-card strong { color: var(--text-white); font-size: 1.1rem; } .job-card p { font-size: 0.99rem; color: var(--text-norm); line-height: 1.4; margin: 10px 0; } .job-card a { display: inline-block; color: var(--code-green); background-color: var(--background-dull); padding: 6px 12px; text-decoration: none; font-weight: bold; font-size: 0.95rem; border-radius: 3px; text-transform: uppercase; max-width: 100%; } .job-card a:hover { } /* "job-card" Active Scanner Effect */ .job-card::after { content: ""; position: absolute; top: -50%; left: -50%; width: 200%; height: 200%; background: linear-gradient(to bottom, transparent, rgba(0, 255, 0, 0.05), transparent); transform: rotate(45deg); animation: scan 3s infinite linear; } @keyframes scan { from { transform: translateY(-100%) rotate(45deg); } to { transform: translateY(100%) rotate(45deg); } } .secure-link { text-decoration: none; font-size: 0.85em; font-weight: bold; } .secure-link:hover { text-decoration: none; background-color: var(--background-main); color: var(--primary-color); cursor: progress; } #activity-log { list-style: none; padding: 10px; background: var(--background-main); font-size: 0.75em; color: var(--code-green); opacity: 0.8; max-height: 150px; overflow: scroll; font-family: 'Courier New', monospace; }

In your index.html file, place this JavaScript Code in your webpage at the bottom before the closing </body> tag.

.js
<script> //The Web Crawler // This script pulls the timestamp from your last_run.json file async function fetchSentinelData() { // 1. UPDATE THESE TWO FIELDS const username = 'fofem'; const repo = 'yourrepoaddress'; // Added a 'cache buster' (?t=...) so you see updates instantly const url = `https://raw.githubusercontent.com/${username}/${repo}/main/last_run.json?t=${new Date().getTime()}`; try { const response = await fetch(url); if (!response.ok) throw new Error('Network response was not ok'); const data = await response.json(); // Update timestamp document.getElementById('update-time').innerText = data.last_update; const container = document.getElementById('job-container'); container.innerHTML = ''; // Clear loading text // Verify if there are findings if (!data.findings || data.findings.length === 0) { container.innerHTML = '
No active leads in last 24h.
'; return; } data.findings.forEach(category => { // Only show categories that actually have jobs if (category.jobs && category.jobs.length > 0) { const section = document.createElement('div'); section.className = 'job-category'; section.innerHTML = `

🔍 ${category.query}

`; category.jobs.forEach(job => { const jobEl = document.createElement('div'); jobEl.className = 'job-card'; jobEl.style = "border-left: 2px solid #444; padding-left: 10px; margin-bottom: 10px;"; jobEl.innerHTML = ` ${job.position}
Source: ${job.company}

${job.details}

View Intelligence → `; section.appendChild(jobEl); }); container.appendChild(section); } }); } catch (error) { console.error('Error fetching Sentinel data:', error); document.getElementById('update-time').innerText = 'Sentinel Offline (Check Connection)'; document.getElementById('job-container').innerHTML = '⚠️ Waiting for pipeline synchronization...'; } } fetchSentinelData(); </script>
ATTENTION! Change the yourrepoaddress to your repo address (your github web address)
    The Full "Handshake" Visualized
  • crawler_script.py: Where you change WHAT you are searching for.
  • main.yml: Where you change WHEN it runs (the cron schedule). For this project, it runs every 12 mid-niight.
  • last_run.json: The "bridge" file created by Python and read by HTML.
  • index.html: Where you change HOW the results look to your visitors.
My Contribution

My contribution was the Architectural Convergence of technical scripting and strategic oversight. I didn't just write a script; I engineered a Digital Intelligence Wing. I handled the transition from local testing to cloud production, debugging Linux-level system dependencies and establishing the security protocols for the GitHub-to-Repository write-back. I acted as the Lead DevOps Engineer, ensuring the system is not just functional, but Extensible—allowing for new search vectors to be added with a single line of code.

The Results

The results represent a 100% reduction in manual surveillance tasks. The ForraCorp pipeline now operates with surgical precision, updating the "Intelligence Logs" every 24 hours. The result is visible below: a Live Status Badge and a Dynamic Timestamp that prove the system's reliability. This project demonstrates that ForraCorp is capable of High-Level Industrial Automation, proving my ability to manage complex systems that bridge the gap between AI code and human creativity.

Future Upgrade

The roadmap for this pipeline focuses on Cognitive Data Filtering. The short-term goal is to integrate a Natural Language Processing (NLP) layer to rank job vacancies based on their alignment with ForraCorp's core mission. The long-term goal is Event-Driven Crawling, where the pipeline "listens" to the web via Webhooks, triggering the surveillance engine the exact moment a high-priority opportunity is posted, transforming "Scheduled Intelligence" into "Real-Time Awareness."

TROVE ID : 007

Python Coding (Email Automation)

Email

Enterprise Python Engineering: Automated SMTP Communication Systems (2022)

Skills / Tools Leveraged

The project utilized advanced Python Scripting and deep integration with SMTP (Simple Mail Transfer Protocol). I leveraged the smtplib library for server connection management and the email.mime module for constructing multi-part messages (handling HTML content and attachments). I applied Security Engineering by implementing SSL/TLS encryption to protect data in transit. Additionally, I leveraged Environment Variable Management to secure sensitive credentials (like SMTP passwords), ensuring that the code remains "Production-Ready" and secure according to modern DevOps standards.

The Challenge / Need / Problem

The primary challenge was the Operational Bottleneck caused by manual email tasks. In a busy ICT environment, sending repetitive emails is not only a waste of specialized talent but is also prone to "Data Fatigue"—where attachments are forgotten or recipients are missed. Furthermore, standard email clients are not designed for "Dynamic Personalization" at scale. I needed a solution that could take data from a source (like a database or CSV) and generate thousands of unique, professional emails in seconds, all while maintaining a secure link to the enterprise mail server.

The Solution

The solution was a Modular Email Automation Script. By engineering a script that separates the "Mailing Logic" from the "Content," I created a reusable asset that can be triggered by other systems (like a Django view or a GitHub Action). This system can send "Rich Text" (HTML) emails that include branding, images, and links, making the automated messages indistinguishable from a manually composed professional email. By adding Exception Handling, I ensured the system can "self-heal," logging any connection failures and retrying until the "Mission is Accomplished."

Step-by-Step Process

To replicate this automated communication system, follow this technical blueprint:

  • Components Used:
    1. Logic:
    2. Python 3.x.
    3. Protocol:
    4. SMTP (Simple Mail Transfer Protocol).
    5. Security:
    6. SSL (Port 465) or STARTTLS (Port 587).
    7. Libraries:
    8. smtplib, email.mime.text, email.mime.multipart.
    Data Collection:
    1. Server Handshake:
    2. Establish a secure connection with the SMTP server (Gmail, Outlook, or Private Server).
    3. Authentication:
    4. Use secure credentials to log in to the automated mailing account.
    5. MIME Construction:
    6. Build the "Envelope" (From, To, Subject) and the "Body" (HTML or Plain Text).
    7. Batch Processing:
    8. Loop through a list of recipients to send personalized messages.
Replication Code (The "Sovereign" Mailer): An Updated and Advance Coding
import smtplib import ssl from email.mime.text import MIMEText from email.mime.multipart import MIMEMultipart def send_automated_email(receiver_email, subject, body): # 1. Configuration smtp_server = "smtp.gmail.com" port = 465 # For SSL sender_email = "your_email@example.com" password = "your_app_password" # Secured via env variables # 2. Construct the Message message = MIMEMultipart() message["Subject"] = subject message["From"] = sender_email message["To"] = receiver_email message.attach(MIMEText(body, "html")) # 3. Secure Execution context = ssl.create_default_context() with smtplib.SMTP_SSL(smtp_server, port, context=context) as server: server.login(sender_email, password) # Secure your password server.sendmail(sender_email, receiver_email, message.as_string()) print(f"Intelligence sent to {receiver_email} successfully.") # Example Usage html_content = "

Rise, Alpha

The new dawn is here.

" send_automated_email("recipient@domain.com", "Kyralion Update", html_content)
OR
The Email Code: A Simple Coding
import smtplib from email.message import EmailMessage from string import Template from pathlib import Path html = Template(Path('meet.html').read_text()) email = EmailMessage() email['from'] = 'Evelyn Ethan' email['to'] = 'evelyn2025@gmail.com' email['subject'] = 'Hi! Janice. This is your big sister Evelyn. Just so you know, I have loved you.' email.set_content(html.substitute({'Surname': 'Forra','Janice': 'Ethan','Phone': '0808 223 3492','Country': 'Neveland','Email': 'jany@forra.com','Company': 'ForraCorp.', }), 'html') with smtplib.SMTP(host='smtp.gmail.com', port=587) as smtp: smtp.ehlo() smtp.starttls() smtp.login('jany@forra.com', '********') # The sender's email and password. Secure your password smtp.send_message(email) print('Your message was sussesfully deliverd.')
My Contribution

My contribution was the Security and Scalability Audit of the mailing logic. I didn't just write a script that sends an email; I engineered a Communication Pipeline. I contributed the logic for HTML Templating, allowing for beautiful, branded emails that align with the ForraCorp aesthetic. I also implemented the Error Logging system, which allows the ICT department to monitor mailing success rates in real-time, ensuring that "No message is left behind" in the haze of digital traffic.

The Results

The results were a 95% increase in communication speed. Tasks that previously took hours are now completed in milliseconds. The organization can now send automated receipts and "Thank You" notes instantly. The system has proven to be incredibly stable, handling hundreds of daily triggers without a single security breach, effectively establishing a "Professional Standard" for all automated outreach.

Future Upgrade

The future upgrade involves Behavioral Response Integration. A short-term goal is to integrate Email Tracking (Open rates and Link clicks) to provide feedback to the Django dashboard. The long-term goal could be an AI-Driven Personalization, where the Python script uses an LLM to "Read" the latest user activity and "Rewrite" the email body in real-time to match the user's specific interests. This will move the project from "Automation" to "Digital Empathy," creating a truly "Searing" connection with every recipient.

TROVE ID : 008

Stand Alone Apps Development (Tkinter): Digital Interface (Clock)

SUNDAY, JANUARY 25, 2026
19:03:34
STATIC DYNAMIC CHRONO-MODE
View Full Screen

The X-Theme Sentinel 2.0: Chrono-Aware Temporal Interface

The X-Theme Sentinel is an advanced desktop utility that redefines the relationship between software and environmental time. Engineered for the high-intensity ForraCorp command center, this "Digital Sentinel" provides more than just temporal data; it utilizes Automated Environmental Response (AER) to synchronize its visual output with the sun's cycle, ensuring optimal legibility and reduced ocular fatigue for the engineering elite.

Skills / Tools Leveraged

This project serves as a masterclass in Logic-Driven UI Adaptation. I utilized Python 3.x and CustomTkinter to develop a dual-layered theme engine. The system leverages Conditional Time-Logic, where the application¡¯s state is determined by real-time system hour polling. I implemented Triple-State Static Routing for manual overrides (System, Deep Navy Dark, and Soft Light) and integrated a Recursive Heartbeat to maintain millisecond synchronization.

The Challenge / Need / Problem

The primary challenge in ICT workspaces is the Static Glare Paradox. A bright screen is necessary during the day but becomes an ocular pollutant during late-night system monitoring. Standard clocks lack the "intelligence" to adapt, requiring manual intervention. I needed a Sovereign Agent¡ªa utility that could automatically pivot its aesthetic based on the hour, providing a "Searing" display at noon and a "Silent" display at midnight without user input.

The Solution

The solution was the Dynamic Chrono-Engine. I engineered a "Dynamic Mode" that utilizes a 24-hour logic gate: from 06:00 to 17:59, the Sentinel adopts a high-contrast Light Theme [rgb(230, 230, 255)]; from 18:00 to 05:59, it transitions to an Industrial Dark Theme [rgb(19, 19, 57)]. This is paired with a Manual Override Console, allowing users to lock the interface into a specific aesthetic regardless of the hour, including a direct handshake with the host OS's System Theme.

Step-by-Step Process
  • Architectural Setup:
  • Initializing a high-impact geometry (1450x750) and establishing the THEMES dictionary for rapid aesthetic switching.
  • Chrono-Logic Implementation:
  • Developing a background loop that evaluates datetime.now().hour against predefined thresholds.
  • Interface Layering:
  • Creating a dedicated Control Frame for theme selectors and a "Dynamic Toggle" switch.
  • Update Synchronization:
  • Implementing the .after(200) recursive logic to ensure the clock and the theme engine are always in sync with the CPU clock.
THE X-THEME SENTINEL 2.3 (Digital Clock)
import customtkinter as ctk from datetime import datetime ################################################## # # # FORRACORP. LTD | THE X-THEME SENTINEL 2.3 # # Feature: Chrono-Logic & Triple Static Theme # # Principal Architect: Ubi Fredrick # # # ################################################## class DigitalSentinel(ctk.CTk): def __init__(self): super().__init__() # --- Window Orchestration --- self.title("ForraCorp Digital Sentinel") self.geometry("1450x750") # UI Hierarchy self.grid_columnconfigure(0, weight=1) self.grid_rowconfigure((0, 1, 2), weight=1) # --- Theme Definitions --- self.THEMES = { "System": "system", "Dark": "dark", "Light": "light" } self.mode = ctk.StringVar(value="Static") # Static or Dynamic # --- UI Components --- # 1. Temporal Display self.date_label = ctk.CTkLabel(self, text="", font=("Boulder", 85, "bold", "italic"), text_color="#C0C0C0") self.date_label.grid(row=0, column=0, pady=(20, 0), sticky="s") self.time_label = ctk.CTkLabel(self, text="", font=("Boulder", 312, "bold")) self.time_label.grid(row=1, column=0, pady=0, sticky="n") # 2. Control Panel (Frame for Buttons) self.control_frame = ctk.CTkFrame(self, fg_color="transparent") self.control_frame.grid(row=2, column=0, pady=20) # Static Theme Selectors self.btn_system = ctk.CTkButton(self.control_frame, text="SYSTEM", width=120, command=lambda: self.set_static("System")) self.btn_system.grid(row=0, column=0, padx=10) self.btn_dark = ctk.CTkButton(self.control_frame, text="DARK", width=120, fg_color="#131339", command=lambda: self.set_static("Dark")) self.btn_dark.grid(row=0, column=1, padx=10) self.btn_light = ctk.CTkButton(self.control_frame, text="LIGHT", width=120, fg_color="#E6E6FF", text_color="black", command=lambda: self.set_static("Light")) self.btn_light.grid(row=0, column=2, padx=10) # Dynamic Mode Toggle self.dyn_toggle = ctk.CTkSwitch(self.control_frame, text="DYNAMIC CHRONO-MODE", command=self.toggle_mode, font=("Boulder", 18)) self.dyn_toggle.grid(row=1, column=0, columnspan=3, pady=20) self.update_sentinel() def set_static(self, theme_key): self.mode.set("Static") self.dyn_toggle.deselect() ctk.set_appearance_mode(self.THEMES[theme_key]) def toggle_mode(self): if self.dyn_toggle.get() == 1: self.mode.set("Dynamic") else: self.mode.set("Static") def update_sentinel(self): now = datetime.now() hour = now.hour # --- Dynamic Theme Logic --- if self.mode.get() == "Dynamic": if 6 <= hour < 18: ctk.set_appearance_mode("light") else: ctk.set_appearance_mode("dark") # Update Display self.time_label.configure(text=now.strftime("%H:%M:%S")) self.date_label.configure(text=now.strftime("%A, %B %d, %Y").upper()) self.after(200, self.update_sentinel) if __name__ == "__main__": app = DigitalSentinel() app.mainloop()
Sentinel-Windows-Executable.zip Sentinel-Windows-Executable.zip
How To Run The Code:
  • If you choose to dowload it or write your own, save it in a known location.
  • Open your Terminal (Command Prompt).
  • In it, navegate to the file location.
  • When you are in the file location, type:
NOTE:
If you re using Windows, use: "py", if it is MacOS, use "python".
Run a file code:
python Clock.py
NOTE:

If the file is in another location (inside another folder), enter the location address like as followed:

Run a file code:
python projects/Clock.py
My Contribution

My contribution was the Strategic Integration of Chronobiology into software design. I didn't just write a clock; I engineered a Circadian Tool. I developed the logic that allows the system to remain responsive to user overrides while maintaining an underlying "Dynamic Awareness." As the Lead Architect, I meticulously selected the RGB values for the Dark [19, 19, 57] and Light [230, 230, 255] themes to ensure they matched the ForraCorp industrial identity.

The Results

The result is a 100% Autonomous Temporal Hub. It has improved workstation ergonomics within the ForraCorp lab by providing an interface that "lives" with the engineer. Whether set to its Deep Navy Dark mode for late-night coding or its Soft Light mode for morning briefings, the Sentinel remains a beacon of precision. It is now a standard-issue desktop utility for all ForraCorp remote workstations.

Digital Sentinel: The X-Theme Clock

Version 1.0 | Developed by ForraCorp.


The Digital Sentinel is more than just a timekeeper; it is a precision-engineered desktop companion designed for the modern workspace. Featuring the signature X-Theme aesthetic—Gold accents on a deep Onyx backdrop—it combines high-performance Python logic with a sleek, minimalist interface.

The code was first writen on july 2023, bet remaind as a code that runs with the Terminal promts/ command lines. Then, on January 2026, a transformation came. It was not just an upgrade, I built it into a desktop stand alone application for Windows OS and MacOS.

Core Features
  1. CustomTkinter UI: A smooth, hardware-accelerated interface that respects system transparency.
  2. High-Contrast "X-Theme": Designed for maximum readability and a premium "Cyber-Tech" look.
  3. Cross-Platform Performance: Native builds optimized specifically for both Windows and macOS Silicon.
  4. Portable Architecture: No installation required. Just download and deploy.

Download & Installation

System Requirements: Windows 10/11 | Python 3.10+ (for source execution)

Download the standalone Python executable or clone the source logic to integrate this high-precision timekeeper into your own workstation.

Platform File Type Instructions
Windows OS .exe Download DigitalSentinel.exe. Double-click to run. No dependencies required.
macOS .dmg Download X-Theme-Clock.dmg. Drag the App to your Applications folder.
Click To Download The X-Theme Clock For Windows:
📥 X-Theme.exe
Click To Download The X-Theme Clock for MacOS:
📥 X-Theme.dmg

If Download refuse to start, try these alternatives:
⬇️ Sentinel-Windows-Executable.zip
⬇️ X-Theme-Clock

Other Documentations:
📂 READ ME
🧩 View Source Code
Technical Specifications
  1. Engine: Python 3.10+
  2. GUI Framework: CustomTkinter (High-DPI Scaling enabled)
  3. Build Pipeline: GitHub Actions (Windows) & PyInstaller (macOS)
  4. Architecture: 64-bit / ARM64 Compatible
Note for macOS Users:

Because this app is independently developed, you may need to right-click the app and select "Open" the first time to bypass the "Unidentified Developer" security check. This is a one-time setup step.

Project Status:

Stable
The Sentinel is now fully operational. It serves as the cornerstone of the FOfemApps suite, showcasing the seamless integration of elegant design and robust backend automation.

Future Upgrade

The next phase for the Sentinel would be the Geospatial Light Sync. The goal is to integrate a Weather API that adjusts the theme's brightness based on the actual local sunset and sunrise times of the user's specific coordinates, moving from "Fixed Hour Logic" to "True Solar Tracking."

TROVE ID : 009

Automated Robotic Systems: Robotic Arm

Robotic Arm
Skills / Tools Leveraged

This project was a foundational experience in electro-mechanical design, basic programming (C/C++ for microcontrollers), and sensor integration. I developed proficiency in CAD software for initial design concepts, circuit board etching, and the precise assembly of mechanical components. Furthermore, troubleshooting complex wiring harnesses and refining motor control algorithms were key skills honed during this collaborative endeavor, setting the stage for future mechatronics projects.

The Challenge / Need / Problem

The Federal Polytechnic Nekede Robotics Lab aimed to showcase its capabilities with an interactive demonstration piece for exhibitions. The challenge was to design and construct a functional robotic arm from scratch using readily available components, within a limited budget and timeframe. The primary goal was to create a system that could execute precise movements, demonstrating the principles of industrial automation and control to a wide audience, including potential students and industry partners. There was a strong need for a tangible, impactful exhibit that could effectively communicate the institution's commitment to cutting-edge technology.

The Solution

Our team engineered a multi-axis robotic arm, capable of performing pre-programmed pick-and-place operations. The arm was controlled by a central microcontroller unit, which translated commands from a simple user interface into precise motor movements. We implemented stepper motors for accurate angular positioning and designed a robust mechanical structure using lightweight, durable materials. The arm's ability to smoothly articulate and grasp objects served as a powerful visual representation of automated manufacturing processes, effectively addressing the exhibition's need for an engaging and educational display.

Step-by-Step Process
  • Components Used:
    1. Microcontroller:
    2. Arduino Uno (or similar ATmega-based board)
    3. Motors:
    4. NEMA 17 Stepper Motors (x4-5 for different axes)
    5. Motor Drivers:
    6. A4988 Stepper Motor Drivers
    7. Power Supply:
    8. 12V/5A DC Power Supply
    9. Mechanical Structure:
    10. Aluminum profiles, acrylic sheets, custom 3D-printed joints
    11. Gripper:
    12. Servo motor-actuated claw mechanism
    13. Wiring:
    14. Jumper wires, breadboard, custom PCB (optional)
  • Practical Guide:
    1. Mechanical Design:
    2. Begin with a CAD drawing of the arm's links, joints, and base. Consider reach, payload, and degrees of freedom.
    3. Component Sourcing:
    4. Gather all parts. For stepper motors, ensure drivers are compatible with your microcontroller and motor current.
    5. Frame Assembly:
    6. Construct the physical arm, ensuring smooth movement at each joint without excessive friction.
    7. Motor & Sensor Integration:
    8. Attach motors to each joint. Mount any limit switches for safety.
    9. Wiring:
    10. Connect motors to drivers, drivers to the microcontroller, and the microcontroller to the power supply. Crucially, double-check all polarity to prevent damage.
    11. Basic Code (Pseudocode for Arduino):
    12. C++
Arduino Pseudocode
#include // Or AccelStepper library for smoother motion // Define stepper motor pins (example for one motor) const int stepsPerRevolution = 200; Stepper motorBase(stepsPerRevolution, 8, 9, 10, 11); void setup() { Serial.begin(9600); motorBase.setSpeed(60); // RPM } void loop() { // Example: Move base motor forward 90 degrees Serial.println("Moving base 90 degrees..."); motorBase.step(stepsPerRevolution / 4); // 90 degrees = 1/4 of a revolution delay(2000); // Add code for other motors (shoulder, elbow, wrist, gripper) // Use functions to define specific movements like "pick_object()" // and "place_object()" }
Calibration & Testing:

Fine-tune motor steps per degree, joint limits, and gripper force. Test each axis independently before integrating movements.

Exhibition Preparation:

Develop a compelling demonstration routine for the arm, showcasing its precision and range of motion.

My Contribution

I was a vital part of the fabrication and assembly team. My responsibilities included precision cutting and shaping of materials for the arm's structure, meticulous wiring of motor control circuits, and contributing to the initial programming and debugging phases. I also played a key role in the aesthetic design of the arm, ensuring it was not only functional but also visually appealing for the exhibition. My hands-on work ensured the robustness and reliability of the mechanical joints and electrical connections, which were critical for the arm's consistent performance during public demonstrations.

The Results

The robotic arm was a highlight of the exhibition, successfully demonstrating the principles of robotics and automation. It attracted significant attention from visitors and served as an excellent recruitment tool for the robotics program. The project validated the team's ability to design, build, and deploy complex electro-mechanical systems from concept to working prototype, fostering a culture of innovation within the lab. This early success provided invaluable experience in collaborative engineering and project management.

Future Upgrade

For future iterations, I would advocate for integrating Inverse Kinematics to simplify programming, allowing users to specify target coordinates rather than individual joint angles. Additionally, incorporating force sensors in the gripper would enable the arm to handle delicate objects with variable pressure, significantly expanding its versatility for more complex tasks. We could also explore wireless control via Bluetooth or Wi-Fi, making the system more portable and user-friendly for remote operation.

TROVE ID : 010

Automated Robotic Systems: Human Interactive Machine

Robot

Human Interactive Robot with Natural Language Processing (2008-2009)

Skills / Tools Leveraged

This groundbreaking project significantly expanded my expertise into the realm of human-robot interaction, aesthetic design, and large-scale fabrication. While Mr. Uche and Mr. Vincent spearheaded the AI and NLP, my contribution focused on the physical manifestation of intelligence. I developed skills in selecting and manipulating various materials for durability and appearance, ensuring seamless integration of internal components with the external shell. This involved careful consideration of access panels, thermal management, and robust mounting solutions for all electronics.

The Challenge / Need / Problem

The primary challenge was to create a robot that could converse naturally and intuitively with humans, breaking down the barrier between machine and user. While the core AI components (Google Text-to-Speech, LLM, AI, Natural Language) handled the intelligence, the physical embodiment needed to be engaging, durable, and user-friendly. There was a critical need to enclose the complex internal electronics within a protective and aesthetically pleasing covering that also allowed for proper heat dissipation and easy access for maintenance, all while making the robot approachable and less intimidating.

The Solution

My direct contribution was the fabrication and overlay of the robot's external covering, which transformed a collection of circuits and motors into a recognizable, interactive entity. I designed and constructed a shell that was both protective and visually appealing, using materials that were easy to clean and offered good acoustic properties for the robot's speakers. The covering incorporated thoughtful access points for charging and maintenance, ensuring the internal sophistication was matched by external practicality. This physical interface was crucial in enabling the robot's seamless interaction, allowing it to "come alive" and respond audibly to typed or spoken queries, fostering a sense of engagement.

Step-by-Step Process
  • Components:
  • (My area of contribution)
    1. Frame/Chassis:
    2. Aluminum extrusion, PVC piping, or custom-welded steel frame
    3. Covering Materials:
    4. ABS plastic sheets, fiberglass, composite panels, or treated wood
    5. Fasteners:
    6. Screws, rivets, industrial-grade adhesive
    7. Mounting Hardware:
    8. Brackets, standoffs for internal components
    9. Finishing:
    10. Sandpaper, primer, paint, clear coat
    11. Ventilation:
    12. Grilles, small fans (if needed for internal cooling)
  • Practical Guide for Fabrication:
    1. Internal Layout Planning:
    2. Before starting, understand the exact dimensions and heat output of all internal components (microcontrollers, speakers, power supplies, etc.). Plan for their mounting points.
    3. Frame Construction:
    4. Build a robust internal frame that will support the weight of all components and the external covering.
    5. Template Creation:
    6. Create paper or cardboard templates for each section of the external covering, ensuring precise fit and smooth curves if desired.
    7. Material Cutting & Shaping:
    8. Cut the chosen covering material according to templates. Use appropriate tools (jigsaw for wood/plastic, metal shears for thin metal). Shape as needed (e.g., heat gun for bending plastics).
    9. Access Panel Design:
    10. Integrate hinged doors or removable panels for access to charging ports, USB ports, and maintenance areas. These should be flush when closed.
    11. Mounting Internal Components:
    12. Securely mount speakers, microphones, and interface screens (for typing) to the inside of the covering, ensuring clear audio paths and screen visibility.
    13. Ventilation:
    14. Incorporate vents or small fan openings to ensure adequate airflow and prevent overheating of internal electronics, especially if the robot will operate for extended periods.
    15. Surface Finishing:
    16. Sand, prime, and paint the external covering for a professional and durable finish. Consider a protective clear coat.
    17. Final Assembly:
    18. Carefully attach the finished covering sections to the internal frame, ensuring all seams are tight and secure.
    19. Testing:
    20. Power on the robot and test all interactive features, paying attention to how the covering affects sound quality and user interaction.
  • My Contribution

    I was directly responsible for the physical embodiment of the Human Interactive Machine. This involved meticulous material selection, precise cutting and shaping of the external panels, and careful assembly to create a durable and aesthetically pleasing shell. I ensured that all internal components, such as speakers and the typing interface, were seamlessly integrated and acoustically optimized within the covering. My work was critical in transforming the sophisticated AI into a tangible, approachable, and robust robot that could effectively engage with users.

    The Results

    The Human Interactive Machine was a landmark project, demonstrating advanced capabilities in AI and human-robot interaction. The robot's ability to hold coherent conversations, both audibly and through a typed interface, captivated audiences. My fabrication work ensured the robot's physical presence was as impressive as its intelligence, providing a durable and user-friendly interface that allowed the complex internal systems to function flawlessly. This project significantly elevated the robotics lab's reputation for innovative research and development.

    Future Upgrade

    For future iterations, I would propose integrating facial recognition and emotion detection capabilities to allow the robot to tailor its responses based on the user's emotional state. Additionally, incorporating gesture recognition would enable a more natural, multimodal interaction, moving beyond purely verbal or typed commands. On the physical side, I would explore modular design for the covering, allowing for quick aesthetic changes or upgrades without a full rebuild.

TROVE ID : 011

Enhanced Control Systems Using Proximity Sensors. (2009)

Robot
Skills / Tools Leveraged

This contract project significantly honed my skills in sensor-based control logic, microcontroller programming (specifically with Arduino/PIC microcontrollers), and practical circuit design. I gained proficiency in selecting the appropriate proximity sensor technology (infrared, ultrasonic, inductive) for specific environmental conditions and target materials. Debugging real-world electronic systems and ensuring robust, reliable operation were central to this project, along with meeting client specifications for accuracy and response time.

The Challenge / Need / Problem

As a contract worker, I was approached to design and implement a cost-effective, reliable control system for various client projects, often involving automation or safety applications. The common challenge was the need for non-contact detection of objects, presence, or distance without relying on physical switches, which can wear out, be prone to mechanical failure, or not be suitable for harsh environments. Existing solutions were often either too expensive, unreliable, or lacked the precision required for specific industrial or consumer applications.

The Solution

I developed custom-enhanced control systems that leveraged the precision and reliability of proximity sensors. Depending on the client's needs, I integrated ultrasonic sensors for distance measurement, infrared sensors for object detection, or inductive sensors for metallic object detection. The sensor data was fed into a microcontroller (e.g., Arduino), which then executed specific control logic – activating relays, triggering alarms, or controlling motors. This allowed for robust, automated decision-making without physical contact, providing precise control and often enhancing safety or efficiency in the client's operation.

Step-by-Step Process
  • Components Used:
    1. Microcontroller:
    2. Arduino Nano/Uno or PIC microcontroller
    3. Proximity Sensor(s):
      • Ultrasonic (HC-SR04) for distance
      • Infrared (IR) proximity sensor (e.g., TCRT5000) for object detection
      • Inductive Proximity Sensor for metal detection
    4. Actuators/Outputs:
    5. Relays, LEDs, buzzers, small DC motors
    6. Resistors, Capacitors, Diodes:
    7. For circuit protection and signal conditioning
    8. Power Supply:
    9. 5V DC regulated
    10. Breadboard & Jumper Wires (for prototyping)
    11. Custom PCB (for final product)
  • Practical Guide:
    1. Sensor Selection:
    2. Choose the right sensor based on:
      • Detection Range:
      • How far does it need to detect?
      • Target Material:
      • Is it metal, opaque, transparent?
      • Environment:
      • Dust, light, moisture?
    3. Circuit Design:
    4. Connect the sensor to the microcontroller. Ensure proper power supply and any necessary pull-up/pull-down resistors.
Basic Sensor Reading Code (Example for Ultrasonic HC-SR04): C++
const int trigPin = 9; const int echoPin = 10; long duration; int distance; void setup() { pinMode(trigPin, OUTPUT); pinMode(echoPin, INPUT); Serial.begin(9600); } void loop() { digitalWrite(trigPin, LOW); delayMicroseconds(2); digitalWrite(trigPin, HIGH); delayMicroseconds(10); digitalWrite(trigPin, LOW); duration = pulseIn(echoPin, HIGH); distance = duration * 0.034 / 2; // Speed of sound calculation (cm) Serial.print("Distance: "); Serial.print(distance); Serial.println(" cm"); if (distance < 10) { // If object is within 10 cm // Trigger an action, e.g., turn on an LED digitalWrite(LED_BUILTIN, HIGH); } else { digitalWrite(LED_BUILTIN, LOW); } delay(100); }
Control Logic Implementation:

Control Logic Implementation: Write code for the microcontroller to process sensor data and activate desired outputs (e.g., if distance < X, turn on a relay; if object detected, start a motor).

Calibration:

Fine-tune sensor thresholds and response timings for optimal performance in the target environment.

Testing & Debugging:

Rigorously test the system under various conditions, identifying and fixing any bugs in the code or wiring.

Client Integration:

Install the final system, provide documentation, and train the client on its operation and basic troubleshooting.

My Contribution

As the lead constructor for these student contract projects, I was responsible for the entire lifecycle of the control system development. This included liaising with clients to understand their specific needs, designing the electronic circuits, selecting and integrating the appropriate proximity sensors, and writing the microcontroller code. My role extended to physically building and testing the prototypes, ensuring they met all functional and reliability requirements, and then deploying the final robust solution.

The Results

These control systems consistently met or exceeded client expectations, providing reliable, automated solutions for various applications. Examples included automated gate openers, liquid level detectors, and safety cut-off switches for machinery. The projects not only provided practical experience but also established my reputation as a skilled and dependable builder of custom electronic solutions, generating further contract work and fostering strong client relationships.

Future Upgrade

I would explore integrating wireless communication (e.g., Bluetooth Low Energy or Wi-Fi) for remote monitoring and control of the sensor systems. Additionally, incorporating machine learning algorithms (TinyML) on the microcontroller could allow for more intelligent decision-making, such as predicting component failure or adapting to changing environmental conditions without explicit reprogramming.

TROVE ID : 012

Dual-Tune Multi-Frequency (DTMF) Signaling System

DTMF

Mobile-Remote Device Control via DTMF Signaling (2010)

Skills / Tools Leveraged

This project was a masterclass in Telecommunications and Analog-to-Digital Interfacing. We used the MT8870 DTMF Decoder IC, specialized relays, and basic logic gates. The system leveraged the global mobile network, using the specific frequencies generated by phone keypads (1, 2, 3, etc.) to trigger physical actions in a remote environment.

The Challenge / Need / Problem

In 2010, IoT (Internet of Things) was not yet accessible in our region. Controlling home appliances or industrial pumps from a distance usually required expensive specialized equipment. The challenge was: How can we control a device from 50 miles away using only a standard mobile phone? We needed a way to translate the sounds made by a phone's keypad into electrical signals that could turn a switch "ON" or "OFF."

The Solution

We developed the DTMF Remote Controller. The system consisted of a mobile phone connected to a decoder circuit. When the user called the "base" phone and pressed a number on their keypad, the MT8870 IC identified the specific frequency pair (Dual-Tone) and converted it into a 4-bit digital code. This code was then used to trigger a relay bank. This allowed a user to dial their home and press "5" to turn on the AC or "0" to shut down the generator from anywhere in the world.

Step-by-Step Process
  • Main Electronics Components:
    MT8870 Decoder IC, 3.5mm Audio Jack, 74HC04 (Inverter), Relays, BC547 Transistors and a 12V DC Power Supply.
    1. Audio Link:
    2. Connect the earphone jack of a "receiver" mobile phone to the input of the MT8870 circuit.
    3. Decoding:
    4. The MT8870 listens for the DTMF tones. Each key (0-9) produces a unique 4-bit binary output (Q1, Q2, Q3, Q4).
    5. Latching Logic:
    6. Connect the binary output to a latching circuit (like a Flip-Flop) so the device stays ON even after the tone stops.
    7. Driver Stage:
    8. Use the digital output to drive a BC547 transistor, which in turn switches a 12V relay.
    9. Operation:
    10. Set the receiver phone to "Auto-Answer." Dial the number, wait for the pick-up, and press the designated keys to control different devices.
My Contribution

I was the Chief Assembly and Soldering Technician. While Analog (Mr. Uche) originated the design and Mr. Iyke managed the application logic, I was responsible for the physical realization of the system. I performed the precision soldering of the IC sockets and relay banks, ensuring that the high-frequency audio signals were shielded from the high-voltage AC lines to prevent interference.

The Results

The system was a breakthrough in local automation. It allowed for unlimited-range remote control using existing cellular infrastructure. We successfully demonstrated the system by controlling a water pump and household lighting from a different city, proving that sophisticated "Smart Home" features could be achieved with analog ingenuity.

Future Upgrade

The modern upgrade would be a DTMF-to-Microcontroller Bridge. By feeding the MT8870 output into an Arduino, we could implement "Security Codes" (requiring a 4-digit PIN before the relay triggers), making the system much more secure against accidental triggers or unauthorized callers.

TROVE ID : 013

Mechatronics: Robotic Minitricycle

Tricycle

Robotic Minitricycle for Institutional Exhibition (2012)

Skills / Tools Leveraged

This collaborative project was a masterclass in mechatronics integration, mechanical engineering principles, and autonomous navigation fundamentals. While 'Analog' led the core robotics, my role deepened my understanding of power management, sensor array optimization, and the critical interplay between mechanical stability and electronic control. I gained further expertise in motor sizing, gear ratio selection, and ensuring the robust physical construction necessary for a mobile platform.

The Challenge / Need / Problem

The Robotics team aimed to create a dynamic and visually engaging exhibit for an inter-institutional showcase. The challenge was to design and build an autonomous mobile robot that could navigate a designated area, demonstrating sophisticated control and mechatronic design. Specifically, the goal was to create a "minitricycle" that was stable, maneuverable, and could operate reliably throughout the exhibition, captivating audiences with its independent movement. The team needed a robust physical platform capable of carrying various sensors and processing units, ensuring consistent performance for an extended period.

The Solution

Our team successfully developed a Robotic Minitricycle, a three-wheeled autonomous platform designed for navigation and demonstration. While 'Analog' focused on the navigation algorithms and core robotics logic, my contribution was critical in ensuring the mechanical integrity and power efficiency of the system. The minitricycle was designed with a low center of gravity for stability, and equipped with a robust motor and wheel configuration for agile movement. Its autonomous capabilities allowed it to showcase advanced mechatronics principles, demonstrating self-navigation within the exhibition space, making it a compelling showcase piece.

Step-by-Step Process
  • Components Used:
    (My Contribution Focus)
    1. Chassis:
    2. Custom-fabricated metal (aluminum or steel) or durable plastic base
    3. Wheels:
    4. x3 (2 driving wheels, 1 castor wheel for steering/balance)
    5. DC Motors:
    6. x2 (geared, for driving the wheels)
    7. Motor Drivers:
    8. L298N H-bridge module or similar
    9. Power Supply:
    10. Rechargeable LiPo or NiMH battery pack (e.g., 7.4V or 11.1V)
    11. Voltage Regulators:
    12. DC-DC buck converters (e.g., LM2596) to provide stable 5V for microcontroller
    13. Wiring:
    14. Heavy-gauge wire for motor power, lighter gauge for signals
    15. Mounting Hardware:
    16. Standoffs, brackets, screws
  • Practical Guide for Mechanical & Power Systems:
    1. Chassis Design:
    2. Design a stable three-wheeled platform. Two driven wheels at the rear/sides, and a steerable/castor wheel at the front/center. Ensure sufficient space for batteries, motors, and electronics.
    3. Motor & Wheel Selection:
    4. Choose DC geared motors with appropriate RPM and torque for the tricycle's size and speed. Select wheels with good grip.
    5. Power System Design:
      • Battery Sizing:
      • Calculate the required battery capacity (mAh) based on expected run time and motor current draw.
      • Voltage Regulation:
      • Use a voltage regulator to provide a stable 5V supply for the microcontroller and sensors from the higher voltage battery.
      • Wiring:
      • Use appropriate wire gauges. Motors draw significant current, so thick wires prevent voltage drop and overheating.
    6. Motor Driver Integration:
    7. Connect the motor drivers to the microcontroller and the motors. Ensure proper current handling for your chosen motors.
    8. Assembly:
      • Mount motors and wheels to the chassis.
      • Securely mount the battery pack, ensuring it's easily accessible for charging.
      • Mount the microcontroller, motor drivers, and any sensors (e.g., ultrasonic or IR for navigation).
Basic Motor Control Code (Pseudocode for Arduino): C++
const int motor1_pin1 = 5; const int motor1_pin2 = 6; const int motor2_pin1 = 7; const int motor2_pin2 = 8; void setup() { pinMode(motor1_pin1, OUTPUT); pinMode(motor1_pin2, OUTPUT); pinMode(motor2_pin1, OUTPUT); pinMode(motor2_pin2, OUTPUT); } void loop() { // Example: Move forward digitalWrite(motor1_pin1, HIGH); digitalWrite(motor1_pin2, LOW); digitalWrite(motor2_pin1, HIGH); digitalWrite(motor2_pin2, LOW); delay(2000); // Move forward for 2 seconds // Example: Turn left (one motor forward, other backward or off) digitalWrite(motor1_pin1, HIGH); digitalWrite(motor1_pin2, LOW); digitalWrite(motor2_pin1, LOW); // Motor 2 off digitalWrite(motor2_pin2, LOW); delay(1000); // Turn left for 1 second }
Testing:

Test motor functionality, battery life, and overall stability. Calibrate sensors and navigation algorithms.

My Contribution

As a key team member in the robotics group, my primary contribution to the Robotic Minitricycle was in the mechanical fabrication and power system design. I was responsible for constructing the robust chassis, ensuring optimal weight distribution for stability, and meticulously integrating the motors, wheels, and battery systems. I focused on reliable power delivery and efficient wiring, which were crucial for the minitricycle's extended operation during the exhibition, allowing 'Analog' to focus on the complex autonomous navigation algorithms.

The Results

The Robotic Minitricycle was a resounding success at the exhibition, effectively showcasing the team's mechatronics capabilities. Its autonomous navigation and stable movement impressed visitors and peer institutions alike. The project reinforced the team's ability to tackle complex engineering challenges, from mechanical design to electronic integration, and contributed to the institution's reputation for practical, hands-on robotics education.

TROVE ID : 0014

Printed Circuit Board (PCB) - Etching

Etching

Custom PCB Fabrication through Chemical Etching (2009)

Skills / Tools Leveraged

This process involved Chemical Engineering and Precision Lithography. We used Ferric Chloride (FeCl3​) as the etchant, copper-clad boards, and permanent resist markers (or toner transfer). This skill was essential for moving away from messy "Perf-boards" and "Breadboards" toward professional, durable, and compact electronic products.

The Challenge / Need / Problem

In 2009, ordering factory-made PCBs was expensive and took weeks to arrive. For our rapid prototyping needs (like the DTMF system or the AVR), we couldn't wait. We needed a way to produce custom-designed circuit boards in our own lab within an hour. The challenge was achieving high-resolution "traces" (copper paths) that were thin enough for complex ICs but thick enough to carry high current without burning out.

The Solution

We mastered the Chemical Etching Method. By creating a "resist" layer on a copper board, we could protect the paths we wanted to keep while the Ferric Chloride "ate away" the unwanted copper. This allowed us to create professional-grade circuits for all our projects, ensuring that our devices were compact, reliable, and aesthetically pleasing.

Step-by-Step Process
  • Materials Needed:
    • Copper-clad board.
    • Ferric Chloride (FeCl3​) powder or solution.
    • Permanent Marker (Resist) or Glossy Photo Paper (for Toner Transfer).
    • Plastic tray (Never use metal).
    • Fine Sandpaper or Steel Wool.
    • Drilling Machine (with 0.8mm - 1mm bits).
    • Preparation:Clean the copper board thoroughly with steel wool until it is shiny and free of oil/fingerprints.
    • Pattern Transfer:
      • Manual:Draw your circuit traces directly on the copper using a permanent "Etch-Resist" marker.
      • Toner Transfer:Print your design on glossy paper using a Laser Printer, then iron it onto the copper board so the toner sticks to it.
    • Etching Bath:Submerge the board in a plastic tray containing a Ferric Chloride solution.
      • Tip:Agitate (rock) the tray gently to speed up the reaction. It usually takes 15–30 minutes.
    • Cleaning:Once the unwanted copper is gone, remove the board and wash it with water. Use a solvent (like Thinner or Acetone) to remove the black marker/toner, revealing the shiny copper paths underneath.
    • Drilling:Use a small drill bit to create holes for the component leads.
    • Finishing:Apply a thin layer of varnish (or solder mask) to prevent the copper from oxidizing over time.
My Contribution

I was the Process Specialist. I refined our "Toner Transfer" technique to ensure we could produce traces as thin as 0.5mm without breakage. I managed the chemical safety protocols and developed a "Heat-Accelerated" etching bath that reduced our production time by 50%, allowing the team to go from a schematic design to a finished board in under an hour.

The Results

Our ability to etch our own PCBs gave us a massive competitive advantage. Every project from 2009 onward—including our contract student projects and industrial prototypes—featured custom-built, professional boards. This not only made our devices more reliable but also significantly increased their market value by giving them a "factory-finished" appearance.

Closing Summary

From the hands-on chemistry of PCB Etching to the advanced logic of Python Web Crawling, my career is a testament to a 'Full-Spectrum' approach to technology. I don't just write code; I understand the copper it runs on. I don't just build hardware; I write the scripts that automate it. I am a builder, a problem-solver, and a lifelong student of innovation.

TROVE ID : 015

Custom Inverter Systems Design (Square & Pure Sine Wave)

Inverter

Custom Programmable Pure Sine Wave Inverters (2005–Present)

Skills / Tools Leveraged

This project spans the full spectrum of power electronics: from Analog PWM (Pulse Width Modulation) in 2005 to modern Microcontroller-based SPWM (Sinusoidal PWM) today. We leverage MOSFET switching arrays, H-Bridge topologies, and Embedded C for programming the "Brain" of the inverter. We use Oscilloscopes to verify the sine wave purity and thermal imaging to optimize the heat sinks for 24/7 operation.

The Challenge / Need / Problem

In 2005, the challenge was simple: basic backup power. However, square-wave inverters cause "humming" in fans and can damage sensitive electronics like modern laptops or medical equipment. The market need transitioned from "any power" to "clean power." Clients now require inverters that are not only powerful (12V/24V to 220V) but also "smart"—offering low-battery cutoffs, overload protection, and a wave shape identical to the national grid.

The Solution

My team (working with 'Analog') developed a Programmable Pure Sine Wave Inverter. Unlike my 2005 square-wave prototype, our current "Brand" units use a high-speed microprocessor to generate a digital sine wave, which is then filtered through our custom-wound transformers. These units feature an LCD interface showing battery voltage and load percentage. We offer a full "Life Cycle" service, including custom builds (choosing between 12V or 24V systems based on the client's energy needs), professional installation, and a comprehensive maintenance warranty.

Step-by-Step Process
  • Components:
  • Microcontroller (PIC or Arduino), MOSFETs (IRF3205 or similar), High-Speed Optocouplers, Custom Copper Transformer, Heat Sinks, Cooling Fans.
    1. Oscillator Setup:
    2. Program the microcontroller to generate a 50Hz SPWM signal.
    3. Driver Stage:
    4. Use Totem-pole or dedicated Gate Driver ICs to switch the MOSFETs at high speed.
    5. H-Bridge Assembly:
    6. Arrange MOSFETs in an H-bridge configuration to alternate the DC current into the transformer.
    7. Filtering:
    8. Use an LC (Inductor-Capacitor) filter on the output to smooth the "steps" into a smooth sine wave.
    9. Protection Logic:
    10. ```c if (Battery_Voltage < 10.5) { Shutdown_Inverter(); Display("Low Battery"); } if (Current_Output > Threshold) { Shutdown_Inverter(); Display("Overload"); }
    11. Casing & Quality Control:
    12. House in a ventilated metal chassis and test under "Inductive Load" (like a fridge or fan) for 12 hours.
My Contribution

I am the Co-Founder and Lead Circuit Designer. While 'Analog' focuses on the core robotics/logic integration, I specialize in the power stages, transformer design, and thermal management. I personally supervise the "Burn-in" tests for every unit that carries our brand name to ensure the 100% reliability we promise our clients.

The Results

What started as a student project in 2005 has evolved into a commercial-grade brand. Our inverters are prized for their durability; units built 5 years ago are still in active service today. We have successfully powered everything from private homes to small clinics, providing a stable, grid-quality power source that is custom-built for the African environment.

Future Upgrade

We are currently developing a Mobile App Bridge using ESP32. This will allow our clients to see their energy consumption and battery health on their phones in real-time, and receive push notifications when it's time for a routine "Maintenance/Service" check-up.

TROVE ID : 016

Automatic Voltage Regulator (AVR)

AVR

Ultra-Wide Range Op-Amp Based Automatic Voltage Stabilizer (2007–2008)

Skills / Tools Leveraged

This project demonstrated mastery in Analog Computation and Comparator Logic. I leveraged Operational Amplifiers (Op-Amps) as the "brain" of the system, configured in non-inverting comparator modes. Key skills included precision calibration of voltage dividers, relay-interfacing for high-current switching, and custom transformer tap calculation. I utilized an oscilloscope to monitor switching transients and ensure that the transition between voltage steps was seamless enough to avoid resetting sensitive electronics.

The Challenge / Need / Problem

In many regions, the national grid fluctuates wildly, often dropping as low as 40V or surging to 280V. Standard off-the-shelf stabilizers usually fail or cut off when the voltage drops below 140V, leaving the user without power. The challenge was to create a "survivalist" AVR that could harvest usable 220V power from an extremely "browned-out" line of only 40V, protecting household appliances from both extreme undervoltage and catastrophic overvoltage.

The Solution

I constructed a high-performance AVR based on a circuit custom-designed by Mr. Ehis. The system used a multi-tapped transformer I wound myself. I configured a bank of Op-Amps to monitor the incoming line; each Op-Amp was tuned to a specific 20V threshold. As the voltage shifted, the Op-Amps would trigger specific relays to "hop" between transformer taps. This allowed the device to maintain a steady 220V output even when the input was a mere 40V—a feat rarely seen in commercial units.

Step-by-Step Process
  • Components:
    LM324 (Quad Op-Amp IC), 12V Relays (30A), Zener Diodes (for reference voltage), Multi-tapped Transformer (Custom Wound), Preset Potentiometers.
    1. Transformer Preparation: Wind a transformer with multiple secondary taps (e.g., 100V, 140V, 180V, 220V, 260V).
    2. Reference Voltage: Set up a stable 5.1V Zener reference for the Op-Amps to compare against.
    3. Comparator Logic:
      1. Configure the LM324 to trigger Relay 1 when input > 40V.
      2. Configure Relay 2 to trigger at 60V, and so on, in 20V increments.
    4. Hysteresis Tuning: Use feedback resistors to ensure the relays don't "chatter" (rapidly flip) when the line voltage sits exactly on a threshold.
    5. Construction: Solder the control board and mount the heavy transformer in a ventilated metal chassis.
    6. Calibration: Use a Variac (Variable AC Transformer) to simulate input from 40V to 280V and adjust the presets until the relays trip at the exact desired intervals.
My Contribution

While Mr. Ehis provided the circuit conceptualization, I was the Lead Constructor and Calibration Engineer. I calculated the wire gauges for the custom transformer to handle the high current required at low voltages, performed the physical PCB assembly, and carried out the rigorous "Variac Stress Test" to ensure the system stabilized the output across the entire 240V swing.

The Results

The AVR was a massive success for personal use, providing steady power during "low current" seasons where other stabilizers were useless. It successfully converted a 40V "ghost" supply into a functional 220V output, protecting refrigerators and televisions from damage. It remained in active service for years, proving the reliability of the Op-Amp comparator design.

Future Upgrade

I plan to replace the analog Op-Amps with a Microcontroller (MCU). This would allow for "Zero-Crossing Switching," where the relays only trigger when the AC sine wave is at zero volts. This prevents the "arcing" of relay contacts, potentially extending the life of the stabilizer by decades.

TROVE ID : 017

Automatic Power Changeover System

Power Changeover

Triple-Source Intelligent Automatic Changeover & Gen-Starter (2010–2015)

Skills / Tools Leveraged

This project involved Industrial Control Logic and Sequential Timing. I leveraged High-Power Contactors, Time-Delay Relays, and basic automation logic. I also applied skills in Internal Combustion Engine (ICE) Interfacing, specifically bypass-wiring the ignition and starter motor of a generator to allow for remote electronic starting. The 2010 design focused on hardware logic, while the later upgrades moved into more complex multi-source priority management.

The Challenge / Need / Problem

The frustration of "NEPA" (National Power) outages is compounded by the manual labor of going outside to start a generator and manually flipping a heavy changeover switch. In 2010, I needed a way to bridge the gap between sources without human effort. Furthermore, switching immediately when power returns is dangerous, as the initial surge can fry appliances. I needed a system that could intelligently "wait" for the power to stabilize before loading it.

The Solution

I designed and built a 3-Way Intelligent Changeover System. The system manages NEPA (Grid), Generator, and Inverter power. When the Grid fails, the system automatically signals the Generator to start. Once the Gen is running, it waits 10 seconds for the engine to stabilize before switching the load. If the Grid returns, the system senses the stable voltage, waits for a "settling period," switches the load back to the Grid, and then gracefully shuts down the Generator. The Inverter acts as the primary silent backup for light loads during the transition.

Step-by-Step Process
  • Components:
  • High-Current Contactors (60A), Delay-on-Make Timers, Ignition Relays, 12V Solenoid (for Gen Choke/Starter), Sensing Transformers. Database,
    1. Sensing Circuit: Install a small transformer on the NEPA line to detect when 220V returns.
    2. Priority Logic: Use interlocked contactors to ensure that two power sources can never be connected at the same time (preventing explosions).
    3. The "Delay" Stage: Integrate a timer relay that waits 30 seconds after power returns to ensure the grid is stable.
    4. Auto-Gen Start: Wire a 12V relay to the Generator's "Key Start" terminals. Program a "Crank" pulse of 3-5 seconds.
    5. 3-Source Integration:
      • Priority 1: NEPA (Grid)
      • Priority 2: Generator (Only if NEPA is dead)
      • Priority 3: Inverter (Silent standby)
My Contribution

I was the Architect and Lead Builder. I pioneered the design at a time when such devices were not commercially common in my area. I handled the electrical wiring of the distribution board and the mechanical modification of the generator's ignition system. I also designed the "3-Source" logic to ensure that the Inverter is never overloaded by heavy appliances when the system switches.

The Results

The system transformed the domestic power experience into a "hands-free" environment. The transition between power sources became so seamless that clocks often didn't even reset. The safety delay significantly reduced appliance failure due to grid surges, and the auto-gen start added a level of luxury and convenience that eliminated the need to step outside during power outages.

Future Upgrade

I am looking into GSM/WiFi Integration. This would allow me to monitor which power source is currently active via a smartphone and provide a "Remote Kill" switch for the generator from anywhere in the world, as well as fuel level monitoring and oil change reminders.

TROVE ID : 018

Power Transformers (Custom Winding)

Robot

Custom Multi-Standard Power Transformers for Advanced Electronics (2004–2023)

Skills / Tools Leveraged

This represents nearly two decades of expertise in Electromagnetics and Manual Winding. I leverage Lamination Theory, calculating VA (Volt-Ampere) ratings, and determining "Turns per Volt" using the core's cross-sectional area. Tools include manual and semi-automatic winding machines, high-grade copper magnet wire, and insulation materials like Mylar and Nomex. I am proficient in designing both Toroidal and E-I Core transformers.

The Challenge / Need / Problem

Off-the-shelf transformers are often bulky, inefficient, or simply do not provide the specific voltage taps required for custom high-end audio or power electronics. For example, an Inverter project might require a very specific 12V to 220V ratio with high current handling that standard units can't provide. The problem was the lack of "precision iron" for specialized prototypes that need multiple DC and AC outputs from a single primary source.

The Solution

I developed a proprietary method for calculating and hand-winding custom transformers tailored to specific project needs. Whether it's a high-frequency transformer for an inverter or a heavy-duty unit for an Automatic Voltage Regulator (AVR), I calculate the exact flux density to ensure the core never reaches saturation. My transformers are known for their low "Hum" (vibration) and high efficiency, often outperforming factory units in heat dissipation because I use high-purity copper and precision-stacked silicon steel laminations.

Step-by-Step Process
  • Components:
  • E-I Silicon Steel Laminations, Plastic Bobbins, Enamelled Copper Wire, Varnish, Insulation Tape.
    • Core Calculation: Measure the center tongue width of the E-lamination to find the Area (A).
    • Turns Calculation: Use the formula N=4.44×f×B×AV×108​ (where f is frequency and B is flux density).
    • Winding: Wind the primary coil first, ensuring even layers. Insulate thoroughly.
    • Secondary Taps: Wind the secondary coils. For a "Variable Supply," I create multiple "taps" at 3V, 6V, 12V, and 24V.
    • Lamination Stacking: Insert E and I plates in an alternating pattern to minimize air gaps.
    • Finishing: Dip the entire unit in insulating varnish and bake to prevent coil vibration.
My Contribution

I am the Master Technician. Every transformer in my portfolio—from my earliest 2004 experiments to my 2023 industrial-grade units—is calculated and wound by me. I ensure that every unit meets the "Personal Project" standard, meaning it is built to last decades, not just years.

The Results

These custom transformers have been the "beating heart" of my most successful projects, including the 2024 Inventory model hardware and my various Inverter brands. They provide a 95%+ efficiency rating and have enabled me to build devices with power specifications that are impossible to achieve with standard parts.

TROVE ID : 019

Electrical Installations & Maintenance

Maintenance

Industrial & Residential Electrical Building Installations (2007–2020)

Skills / Tools Leveraged

This domain covers Load Calculation, Blueprint Interpretation, and Project Management. I leverage tools like earth testers, insulation resistance testers (Megger), and conduit bending equipment. My expertise includes 3-Phase Power Distribution, Phase Balancing (to prevent transformer overload), and grounding (earthing) systems. I am proficient in both surface and conduit (internal) piping according to international safety standards (IEE regulations).

The Challenge / Need / Problem

Poor electrical installation is a leading cause of house fires and equipment failure. Many buildings suffer from "Phase Imbalance," where one wire is overloaded while others are empty, leading to frequent blown fuses and dim lights. The challenge in this professional service is to design a distribution system that is safe, balanced, and future-proofed for modern high-draw appliances like ACs and electric heaters.

The Solution

Since 2007, I have provided Professional Electrical Contracting services. My approach begins with a "Load Audit" of the building to determine the total wattage. I then design a distribution map that balances the load across the available phases. I prioritize safety by installing dedicated Residual Current Devices (RCDs) and ensuring a low-resistance earth pit. My installations are built for "Serviceability," meaning all junction boxes are labeled and wires are color-coded for easy future maintenance.

Step-by-Step Process
  • Site Survey & Blueprinting:
    Analyze the architectural drawing to determine the placement of points, sockets, and the Distribution Board (DB).
  • Piping & Chasing:
    Lay high-quality PVC conduits before the walls are plastered.
  • Wiring:
    Pull cables through the conduits. I use specific gauges (1.5mm for lights, 2.5mm for sockets, 4mm-6mm for ACs).
  • Phase Balancing:
    Carefully distribute the circuits across the Red, Yellow, and Blue phases at the DB to ensure even current draw.
  • Earthing:
    Drive copper electrodes into the ground and treat the soil to achieve a resistance of less than 2 Ohms.
  • Testing:
    Perform "Dead Tests" (continuity) and "Live Tests" (voltage/polarity) before handing over the keys to the client.
My Contribution

I am the Lead Contractor and Mentor. Over the years, I have moved from doing the physical piping to managing large-scale projects. I have personally trained and mentored a team of subordinates, many of whom have now graduated to become master installers themselves, perpetuating my standards of safety and precision in the industry.

The Results

I have successfully completed dozens of building installations, ranging from private luxury villas to commercial workshops. None of my installations have ever resulted in a fire or electrical failure, a record I am extremely proud of. My work is known for its "Cleanliness"—organized DBs and perfectly leveled sockets—which has made my team a preferred choice for high-end construction projects.

Future Upgrade

I am transitioning my installation practice toward Smart Home Integration. This involves pre-wiring buildings for "Neutral at the Switch" to accommodate smart WiFi switches and installing dedicated "Inverter Circuits" and "Solar Trunking" as a standard feature in every new building project.

TROVE ID : 020

Technical Drawings & Schematics

Three Phase and Neutral DB

Schematic Design & Architectural Wiring Diagrams

Skills / Tools Leveraged

This skill involves CAD (Computer-Aided Design), Proteus for circuit simulation, and standard architectural symbols. I am proficient in creating both "Single-Line Diagrams" for electrical installations and "Component-Level Schematics" for PCB design. I use these drawings to perform Virtual Prototyping, testing a circuit’s logic on paper before a single wire is cut or a board is etched.

The Challenge / Need / Problem

Building a complex system (like an AVR or a 3-source changeover) without a drawing is like driving in the dark. Without a schematic, troubleshooting becomes impossible, and safety is compromised. The challenge was to translate a mental concept into a standardized technical drawing that could be used for construction, future maintenance, and safety inspections.

The Solution

Every project I undertake begins with a Comprehensive Schematic Phase. I draw detailed wiring maps for electrical installations, identifying every load and breaker. For my electronics projects, I design circuit diagrams that show the exact flow of current through every transistor and IC. These drawings serve as the "Source of Truth" for the project, ensuring that any technician who looks at the work in 10 years will understand exactly how it was built.

Step-by-Step Process
  • Requirement Mapping:
    List every component or power point needed.
  • Drafting:
    Use CAD software to place components and draw the connecting "Nets" or wires.
  • Simulation (for Electronics):
    Run a software simulation to see if the circuit behaves as expected (e.g., "Does the Op-Amp trigger the relay at 40V?").
  • Labeling:
    Every wire is color-coded and every component is numbered (R1, C1, etc.).
  • Final Print:
    The schematic is printed and often laminated to be kept inside the device’s chassis or the building’s distribution board.
My Contribution

I am the Lead Designer and Drafter. I treat the technical drawing as a work of art that must be technically flawless. I have produced diagrams for everything from simple anti-theft alarms to complex industrial power grids. My drawings have often been used by other engineers as templates for their own work, testifying to the clarity and accuracy of my designs.

The Results

My commitment to technical drawing has resulted in near-zero installation errors. Because the "thinking" is done on the schematic, the "doing" becomes mechanical and efficient. These drawings have saved countless hours during maintenance phases, allowing for rapid fault-finding and ensuring the long-term safety of every system I have built.

TROVE ID : 021

CCTV System Installations and Operations

CCTV

Commercial & Industrial Surveillance Infrastructure (2020–2025)

Skills / Tools Leveraged

This project highlights my expertise in Network Engineering and Security Hardware. I work with IP Cameras, NVRs (Network Video Recorders), and PoE (Power over Ethernet) switching. My toolkit includes cable crimpers, BNC connectors, and network testers. I am proficient in Port Forwarding for remote viewing and configuring motion detection zones to optimize storage space.

The Challenge / Need / Problem

In high-stakes environments like pharmaceutical plants and retail outlets, CCTV isn't just about "watching"; it's about compliance and loss prevention. These businesses needed 24/7 coverage with no "blind spots." The challenge was often dealing with older, failing hardware or installing new systems in complex environments where cable runs are difficult. There was a need for a technician who could not only install the system but also service and troubleshoot it to ensure the footage is available when an incident occurs.

The Solution

I managed the End-to-End Deployment and Maintenance of CCTV systems across multiple business locations. I designed camera layouts that maximized coverage while minimizing the number of units needed. I specialized in "Hardened" installations—ensuring that DVRs/NVRs were secured in lockboxes and that cabling was tamper-proof. For systems out of warranty, I performed board-level troubleshooting and component replacement, saving the companies thousands in equipment replacement costs.

Step-by-Step Process
  • Site Survey:
  • Identify critical areas (entrances, cash points, high-value inventory).
  • Cable Pulling:
  • Run Cat6 (for IP) or Coaxial (for Analog) cables through protected conduits.
  • Hardware Mounting:
  • Install cameras with proper angles to avoid glare from windows or indoor lighting.
  • NVR Configuration:
    • Set up recording schedules (Continuous vs. Motion-triggered).
    • Configure HDD (Hard Drive) management for "Overwrite" cycles.
  • Network Integration:
  • Configure the router for remote access so management can view the feed via a mobile app.
  • Maintenance:
  • Regularly clean lenses, check power supplies, and verify that the "Time/Date" stamps are accurate (critical for legal evidence).
My Contribution

I served as the Project Manager and Lead Technical Installer. In my roles at pharmaceutical and retail companies, I took full ownership of the security grid. I didn't just install the hardware; I Operated and Maintained the system daily. I was the go-to person for retrieving footage for investigations and for reviving "dead" cameras that were no longer supported by external warranties.

The Results

The result was a reliable, high-definition security perimeter that significantly reduced internal and external theft. In the pharmaceutical setting, the CCTV system ensured compliance with safety protocols. My ability to troubleshoot and service existing hardware extended the lifespan of the company's security investment by years, ensuring that "Total Cost of Ownership" remained low while security remained high.

Future Upgrade

I am currently researching the integration of AI-based Video Analytics. This would include "Object Counting" for retail traffic analysis and "Face Mask/PPE Detection" for industrial safety, transforming the CCTV system from a passive observer into an active business intelligence tool.

TROVE ID : 022

Anti-Theft Trigger Alarm System

Alarm

Multi-Zone Anti-Theft Trigger & Siren System (2009)

Skills / Tools Leveraged

This project utilized Security Logic Design and Sensor Interfacing. I leveraged Magnetic Reed Switches, PIR (Passive Infrared) Motion Sensors, and SCR (Silicon Controlled Rectifier) latching circuits. The project required knowledge of "Normally Closed" (NC) vs. "Normally Open" (NO) loop logic to ensure the alarm would trigger even if a burglar cut the wires.

The Challenge / Need / Problem

As a contract student project, the goal was to provide an affordable but un-hackable security system for a residential unit. Traditional alarms were either too expensive or relied on simple switches that a smart thief could bypass. The challenge was to create a system that, once triggered, would "latch" (keep ringing) even if the thief closed the door again or tried to smash the sensor.

The Solution

I built a Latching Anti-Theft Alarm. The system used a perimeter of magnetic sensors on doors and windows. I implemented a Thyristor-based latching circuit: once a sensor was tripped, the Thyristor would conduct and keep the siren screaming until a hidden "Master Reset" was pressed by the owner. I also integrated a backup battery system, ensuring the alarm would still function even if the burglar cut the main power to the house before breaking in.

Step-by-Step Process
  • Components:
  • SCR (C106), Magnetic Reed Switches, 120dB DC Siren, 12V Lead Acid Battery, Key-switch (for arming/disarming).
    • Sensor Loop: Install reed switches on all entry points in a "Series" configuration.
    • Latching Circuitry: Connect the sensor loop to the Gate of the SCR.
    • Trigger Logic: Plaintext
    • Condition: Loop is broken (Door opens) ->
    • Action: Current flows to SCR Gate ->
    • Result: SCR turns on and "Latches" -> Siren is powered.
    • Siren Mounting: Place the siren in a high, hard-to-reach location with a protective metal cage.
    • Arming System: Install a key-operated switch at the main entrance that bypasses the circuit when the owner is home.
My Contribution

I served as the Project Lead and System Constructor. I designed the circuit to be "Fail-Safe," meaning any cut in the wire would trigger the alarm. I also handled the physical installation, ensuring the wiring was concealed behind walls and moldings to prevent tampering.

The Results

The project was highly rated for its "Commercial Grade" reliability. It successfully demonstrated how simple analog components could be configured into a high-security device. The latching feature was particularly praised, as it ensured that the alarm couldn't be silenced by simply shutting the door.

Future Upgrade

I plan to add an Auto-Dialer Module. Using a SIM800L GSM module, the system will not only scream locally but also send an SMS and place a phone call to the owner and local security services the moment a breach is detected.

TROVE ID : 023

Automated Door Opening System

Tagged Vehicle Permit System

RFID-Based Automated Vehicle Identification and Gate Control (2016)

Skills / Tools Leveraged

This project utilized Radio Frequency Identification (RFID) technology, specifically long-range UHF (Ultra-High Frequency) sensors, to detect authorized vehicles. Tools leveraged included Arduino and Raspberry Pi for the logic controller, Relay logic for high-current motor control, and C++ for the backend identification algorithms. I applied advanced signal processing to ensure the system didn't trigger from false positives, such as tags in nearby parked cars, by implementing a signal strength threshold.

The Challenge / Need / Problem

The client required a seamless, hands-free entry system for their private residence. Manual remotes are often misplaced or difficult to operate while driving, and standard motion sensors open for any car, posing a security risk. The challenge was to create a "Whitelisted" system: the gate must remain strictly locked for the general public but open automatically—and only—for the owner's specific vehicles as they approach the driveway, requiring zero manual input from the driver.

The Solution

I designed and installed an Automated Gate Controller with Encrypted Security Tags. Each authorized vehicle was equipped with a passive UHF RFID tag. A long-range reader at the entrance continuously scanned for these unique IDs. Upon a successful "handshake" between the vehicle tag and the reader, the system sent a signal to a heavy-duty actuator to swing the gate open. For added security, I programmed a "Timeout" feature that automatically closed the gate once the vehicle cleared a set of safety infrared beams, ensuring no unauthorized tailgating could occur.

Step-by-Step Process
  • Components:
  • Long-range UHF RFID Reader (8-12m range), UHF Passive Tags, Arduino Uno, 2-Channel Relay Module (10A), Linear Actuator or Sliding Gate Motor.
    • Tag Mounting: Affix UHF tags to the upper corner of the vehicle windshield.
    • Antenna Alignment: Position the RFID antenna at the gate entrance, angled to capture approaching vehicles at a 45-degree angle.
    • Controller Wiring:
      • Connect the RFID reader's Wiegand/RS232 output to the Arduino.
      • Connect the Arduino digital output to the Relay input.
      • Connect the Relay "Normally Open" (NO) contacts to the gate motor’s "Start" terminals.
  • Installation:
  • Enclose the electronics in an IP66-rated waterproof box to withstand outdoor conditions.
My Contribution

I served as the Principal Engineer and Installer. I designed the circuit architecture, selected the specific UHF frequency to ensure range through glass, and handled the mechanical installation of the gate actuators. I also performed the security programming, creating a database of "Authorized IDs" that the owner could update if they purchased a new vehicle.

The Results

The system provided a "VIP entry" experience with 100% identification accuracy over the testing period. The owner no longer had to stop or roll down windows in the rain to use a keypad or remote. Security was significantly enhanced, as the gate remained unresponsive to any vehicle without the encrypted physical tag.

Future Upgrade

I plan to integrate License Plate Recognition (LPR) using an AI camera as a secondary authentication factor (Two-Factor Authentication). This would ensure that even if a tag is stolen, the gate will only open if both the tag ID and the vehicle's license plate match the database record.

TROVE ID : 024

Dark / Light Detectors Switching Systems

Darkness Activation Circuit

Automated Solar Street Light Switching System (2009)

Skills / Tools Leveraged

This project focused on Analog Electronics and Optoelectronics. I leveraged components like LDRs (Light Dependent Resistors), Bipolar Junction Transistors (BJTs), and Electromagnetic Relays. The project required a deep understanding of voltage dividers and the "Switching" characteristics of transistors. I also applied skills in PCB etching and enclosure design to ensure the sensor was protected from the very light it was meant to control (preventing a feedback loop).

The Challenge / Need / Problem

In 2009, many street lighting systems in institutions relied on manual operation, leading to massive energy waste when lights were left on during the day, or safety hazards when they weren't turned on promptly at dusk. The challenge was to create a "Set and Forget" system for solar-powered lights that could accurately detect the transition between day and night and toggle the high-voltage lamps accordingly without human intervention.

The Solution

I constructed an Automatic Dusk-to-Dawn Controller. The heart of the system was a Wheatstone bridge circuit featuring an LDR. When ambient light hit the LDR, its resistance dropped, keeping the transistor in an "OFF" state. As darkness fell, the resistance increased, triggering the transistor to energize a relay, which then switched on the solar lamps. I added a "Hysteresis" capacitor to prevent the lights from flickering during cloudy weather or when momentary flashes (like car headlights) passed the sensor.

Step-by-Step Process
  • Components:
  • LDR, 10k Potentiometer (for sensitivity adjustment), BC547 Transistor, 1N4007 Diode, 12V Relay, 100uF Capacitor.
    1. Circuit Assembly: Create a voltage divider using the LDR and the 10k Potentiometer.
    2. Sensitivity Tuning: Connect the divider output to the Base of the BC547 transistor. Use the pot to set the "Darkness Threshold."
    3. Relay Protection: Place a flyback diode (1N4007) across the relay coil to protect the transistor from voltage spikes when the relay switches.
    4. Practical Logic:
      • Daytime = Low LDR Resistance = Transistor Base Grounded = Relay OFF.
      • Nighttime = High LDR Resistance = Transistor Base High = Relay ON.
    5. Placement: Mount the LDR inside a transparent, weatherproof dome positioned away from the light source it controls to avoid "oscillating" (turning itself off).
My Contribution

As a contract student project, I was the Lead Designer and Manufacturer. I didn't just build the circuit; I provided a full technical report and a demonstration unit. I optimized the design to be extremely low-power so that the switching circuit itself didn't drain the solar batteries during the day.

The Results

The project successfully demonstrated a 15% increase in battery longevity for solar systems by ensuring lights were never on unnecessarily. It became a template for street lighting student projects at the institution and led to several subsequent contracts for larger-scale garden lighting systems.

Future Upgrade

I intend to replace the analog circuit with a Micro-controller based IoT system. This would allow the street lights to be monitored via a mobile app, providing data on "Lamp Health" and allowing the owner to manually override the sensor for special events or security lockdowns.

TROVE ID : 025

Audio-Video (AV) System Connectivity (including Satellite/Cable)

Audio Video Connectivity

Professional AV Infrastructure for Domestic Accomodations and Large-Scale Auditoriums (Kingdom & Assembly Halls)

Skills / Tools Leveraged

This project required high-level expertise in Signal Flow Architecture and Audio Engineering. I leveraged tools such as Digital Mixing Consoles (Behringer X32/Midas), Signal Processors, and HDMI/SDI Switchers. My skills included impedance matching for long cable runs, frequency coordination for wireless microphones to avoid interference, and the configuration of Acoustic Echo Cancellation (AEC) for hybrid meetings.

The Challenge / Need / Problem

Large auditoriums and Assembly Halls face significant challenges with Acoustic Clarity and Signal Latency. In high-occupancy spaces, sound can bounce, creating echoes that make speech unintelligible. Furthermore, with the shift toward hybrid meetings, there was a critical need to bridge the "In-Person" audio with "Virtual" platforms seamlessly, ensuring that those listening remotely had the same high-quality experience as those in the front row.

The Solution

Working with the Local Design and Construction (LDC) groups, I designed and installed integrated AV systems that prioritized speech intelligibility. I implemented Balanced Audio Lines to eliminate hum and noise over long distances and configured multi-camera setups for high-definition video streaming. For Assembly Halls, I managed complex signal routing where audio had to be distributed across multiple overflow rooms and outdoor areas simultaneously without losing sync or quality.

Step-by-Step Process
  • Acoustic Mapping:
  • Analyze the hall to determine speaker placement for even sound distribution.
  • Cable Infrastructure:
  • Run shielded XLR for audio and SDI/Fiber-optic for video to ensure zero signal degradation.
  • Mixer Configuration:
  • Set up "Buses" and "Matrices." Example: Matrix 1 for In-house speakers, Matrix 2 for the Zoom/Stream feed.
  • Gain Staging:
  • Calibrate every link in the chain—from the microphone preamp to the power amplifier—to prevent clipping and distortion.
  • Streaming Integration:
  • Connect the mixer output to a computer interface (like a Focusrite) to feed high-quality audio into meeting software.
  • Oversight & Training:
  • Draft "Standard Operating Procedures" (SOPs) and train local volunteers to operate the desk during live events.
My Contribution

I served as an AV Technical Lead and Oversight Coordinator. My primary role was ensuring that the technical complexity was invisible to the audience. I trained dozens of volunteers in the art of "Live Mixing," teaching them how to balance levels and troubleshoot mid-program. My oversight ensured that the installations were robust enough to handle 24/7 use with minimal downtime.

The Results

The result was a crystal-clear auditory experience for thousands of attendees. The transition to hybrid meetings was flawless, with remote participants reporting excellent audio quality. The systems I installed and maintained became the benchmark for reliability within the region’s LDC projects, characterized by high-fidelity sound and intuitive operation.

TROVE ID : 026

Systems Support (Remote Admin/AnyDesk)

Vitual Assistant

Remote Technical Assistance & Virtual Communication Management

Skills / Tools Leveraged

I am proficient in Remote Desktop Protocols (RDP) and third-party tools like AnyDesk and TeamViewer. For virtual communication and administrative workflows, I leverage Microsoft Teams, Zoom, WhatsApp, Telegram, and KHCONF. My skills include remote registry editing, driver troubleshooting, and "Over-the-Shoulder" coaching, where I use screen-sharing to guide users through complex software configurations.

The Challenge / Need / Problem

In a globalized and remote-working world, technical issues often happen when the expert is miles away. Walking a non-technical user through a complex fix via a phone call is often frustrating and prone to error. There was a need for a "hands-on" approach that allowed for immediate intervention without the cost and delay of physical travel, especially for critical virtual meetings where downtime is not an option.

The Solution

I established a Remote Support Protocol using AnyDesk and TeamViewer to provide instant technical relief. With permitted access, I can take full control of a remote device to repair OS errors, remove malware, or configure meeting software. I also manage the backend of virtual communication platforms, ensuring that meetings on Zoom or KHCONF are stable, secure, and accessible to all participants, regardless of their technical literacy.

Step-by-Step Process
  • Session Initiation:
  • The user generates a secure "Connection ID" and password via TeamViewer/AnyDesk.
  • Diagnostic Phase:
  • Once connected, I analyze the System Logs and Task Manager to identify the bottleneck or error.
  • Remediation:
  • I perform the fix (e.g., updating a conflicting driver or repairing a corrupt database entry) while the user watches.
  • Network Optimization:
  • For virtual meetings, I use "Ping" tests to check for jitter and adjust the software’s "Bandwidth Settings" accordingly.
  • Security Handover:
  • Once fixed, I disconnect, ensuring the user changes their access credentials for continued security.
My Contribution

I acted as a Remote Systems Administrator. I provided a "Help Desk" experience for individuals and groups, often resolving issues in minutes that would have taken hours of verbal explanation. I became the primary technical moderator for virtual meetings, ensuring that high-profile communications remained uninterrupted by technical glitches.

The Results

I have successfully resolved hundreds of remote tickets, leading to a 90% reduction in downtime for the groups I support. By leveraging these tools, I have empowered non-technical users to utilize modern communication platforms effectively, ensuring that geography is never a barrier to collaboration or education.

TROVE ID : 027

Computer Hardware Diagnostics and Maintenance

Troubleshooting a faulty Computer

End-to-End PC Hardware Lifecycle Management

Skills / Tools Leveraged

This domain focuses on Component-Level Diagnostics and System Integration. I am skilled in using POST (Power-On Self-Test) cards, multimeters, and thermal paste application tools. I am proficient in the installation and optimization of all major OSs (Windows, Linux, macOS), BIOS/UEFI flashing, and hardware upgrades (SSD cloning, RAM expansion, and GPU installation).

The Challenge / Need / Problem

Computers are the lifeblood of modern work, yet they are prone to hardware fatigue, overheating, and software bloat. A "slow" or "dead" computer is often discarded when it could be revived with a simple diagnostic and part replacement. There was a need for a technician who could accurately distinguish between a failing Power Supply (PSU), a corrupt Hard Drive, or a faulty Motherboard capacitor, saving the owner from the high cost of total replacement.

The Solution

I provide Comprehensive Hardware "Healthcare." My approach is to treat a computer as a modular system. I perform deep-cleaning of thermal systems to prevent "Thermal Throttling," replace spinning hard drives with modern SSDs to breathe new life into older machines, and handle the clean installation of Operating Systems to ensure maximum performance and security. I don't just fix what is broken; I optimize the entire machine for the user’s specific workload.

Step-by-Step Process
  • Visual Inspection:
  • Check for "blown" capacitors, dust buildup, or loose connections.
  • POST (Power On Safe Test) Diagnostic:
  • If the PC won't boot, I listen for "Beep Codes" or use a diagnostic card to find the hardware fault.
  • Part Replacement:
  • Swap out faulty components (e.g., replacing a dead PSU or a failing CMOS battery).
  • OS Installation:
  • Perform a "Clean Install," including the latest security patches and essential drivers.
  • Stress Testing:
  • Run a "Burn-in" test (e.g., Prime95) to ensure the system is stable under high temperatures and load.

DiagnosticsFixing a Faulty Computer

My Contribution

I am a Hardware Specialist. I have revived dozens of machines that were written off as "scrap," converting them into powerful workstations for students and professionals. My contribution lies in my "Repair over Replace" philosophy, which promotes sustainability and cost-efficiency for my clients.

The Results

My maintenance protocols have led to a 300% increase in system speed for many clients through SSD and RAM upgrades. I have a 98% success rate in data recovery from failing drives, ensuring that critical documents and family photos are not lost during hardware failures.

TROVE ID : 028

Project and Management

Project Management

Strategic Operations & Management

This project scope encompasses the comprehensive management, coordination, and execution of diverse business initiatives within ForraCorp and partner organizations. Project management here is treated as a high-stakes orchestration of resources, timelines, and client expectations. It involves the full lifecycle of a project—from the initial high-level business negotiations and client intake to the final delivery of a product that meets exact specifications. By applying systematic methodologies, this role ensures that complex ventures, whether in ICT, creative production, or retail infrastructure, are delivered with a "zero-failure" mindset. It is the bridge between a client’s vision and a tangible, high-quality reality.

Skills / Tools Leveraged

The management of these projects relies on a robust stack of Agile and Waterfall methodologies, utilized to maintain flexibility while respecting hard deadlines. I leverage Critical Path Analysis (CPA) to identify essential tasks and prevent bottlenecks in the production cycle. Communication tools like Slack, Trello, and Microsoft Project are used to maintain transparency with stakeholders and teams. Additionally, my background in Financial Negotiation and Contract Management is leveraged during the "Business Negotiation" phase at ForraCorp to ensure project feasibility and profitability. I also apply Quality Assurance (QA) Frameworks to audit project outputs against client-provided specifications before final delivery.

The Challenge / Need / Problem

The primary challenge in project management is the "Entropy of Specifications"—where project goals drift, timelines slip, and resource allocation becomes inefficient due to a lack of central oversight. At ForraCorp and Reagan Remedies, projects often involve multi-disciplinary teams (ICT, HR, and Operations) that can become siloed. Without a strong managerial "Sentinel," these silos lead to communication breakdowns and missed deadlines. Furthermore, negotiating with high-level clients requires a delicate balance of protecting the organization’s interests while satisfying the client’s demands, a task that requires both technical knowledge and sophisticated diplomatic skills.

The Solution

The solution was the implementation of a Unified Project Governance Model. By serving as the central point of contact for negotiations and supervision, I created a "Single Source of Truth" for every project. I established strict Milestone-Based Tracking, where every project phase must be cleared against a checklist before moving forward. To address the issue of siloing, I implemented Cross-Functional Briefings, ensuring that all departments are aligned with the project's ultimate goal. This structural clarity allows ForraCorp to handle multiple, overlapping projects simultaneously without compromising on the quality or the rigorous timelines demanded by the board of directors and external clients.

Step-by-Step Process
  • The management process follows a disciplined architectural flow to guarantee success:
    • Negotiation & Intake: Meet with clients to define project scope, deliverables, and budget.
    • Planning & Resource Allocation:
    • Map out the project timeline using Gantt charts and assign the necessary personnel.
    • Execution & Daily Supervision: Monitor real-time progress, ensuring that technical specifications (ICT or otherwise) are being met.
    • Quality Control: Conduct "Internal Audits" of the project output at the 50% and 90% completion marks.
    • Client Handover: Present the final project, ensuring all original specifications have been satisfied.
    • Post-Mortem Analysis: Review the project’s performance to refine future management strategies.
My Contribution

My contribution is the Sovereign Oversight of the entire project portfolio. I personally handle the business negotiations to set realistic yet ambitious expectations. I introduced the principle of Proactive Timeline Management, where I insist on finishing tasks before the deadline to provide a buffer for unforeseen challenges. My role is that of a "Strategic Buffer," protecting my team from scope creep while ensuring the board of directors sees consistent results. I am responsible for the final "Sign-off" on all projects, meaning the integrity of the ForraCorp brand rests on my daily supervisory decisions.

The Results

The result has been a 100% On-Time Completion Rate across all managed projects, including those with the LDC. By streamlining the negotiation and supervision process, I have increased the "Project Velocity"—the speed at which we can move from a concept to a finished product. Client satisfaction has led to repeat business and stronger, more lucrative contracts for ForraCorp. Internally, the organization has benefited from a more structured environment where project goals are clear, stress is reduced through better planning, and the final output is consistently of a "Professional Standard" that exceeds basic industry requirements.

Future Upgrade

The future of project management at ForraCorp involves AI-Integrated Resource Forecasting. I intend to implement predictive analytics to better estimate the "Man-Hours" required for complex ICT and creative projects, allowing for even more accurate client quotes. I am also looking toward Cloud-Based Real-Time Supervision Dashboards, where clients can log in and see a live status bar of their project's progress. This transparency will further enhance trust and allow for "Global Project Management," where ForraCorp can coordinate projects across different time zones and international borders with the same precision as a local task.

TROVE ID : 029

Human Resources Manager (HRM) Duties and Responsibilities

HRM

Strategic Human Capital Management: From Recruitment to Institutional Leadership

This project area defines the comprehensive HRM lifecycle managed at Reagan Remedies Limited and Gain More Retail Outlet. It covers the transition from an ICT-focused role into a full-scale Head of Human Resources. The scope of work includes the entire employment process: identifying staffing gaps, managing recruitment pipelines, conducting high-level interviews, and overseeing the legal and ethical aspects of staff departures (resignations, suspensions, or dismissals). This is an exercise in "Human Engineering," ensuring that the right talent is placed in the right position to drive the organization's mission forward while maintaining a healthy, disciplined, and productive workplace culture.

Skills / Tools Leveraged

This role requires a blend of Behavioral Psychology, Labor Law, and Administrative Systems. I leverage Competency-Based Interviewing (CBI) techniques to filter candidates not just for technical skills, but for cultural fit. Tools such as HRIS (Human Resource Information Systems) are used for record-keeping and payroll synchronization. I also utilize Conflict Resolution and Mediation strategies to manage work-related challenges. My ability to act as a "Home-Based HR" while technically leading the ICT department demonstrates a unique skill in Dual-Departmental Governance, requiring high-level organizational multitasking and an intimate understanding of the board of directors' strategic objectives.

The Challenge / Need / Problem

A recurring challenge in the retail and pharmaceutical sectors is Staff Turnover and Operational Discontinuity. When Reagan Remedies' HRM resigned, the organization faced a "Leadership Vacuum" that threatened to disrupt the recruitment and disciplinary cycles. Similarly, at Gain More, having HR duties contracted out meant there was no "On-the-Ground" authority to handle immediate personnel crises. Without internal HR leadership, staff discipline falters, orientation for new hires becomes disorganized, and work-related challenges go unaddressed, leading to a toxic work environment and decreased productivity for the organization.

The Solution

The solution was to Internalize the HR Function by stepping into the role of HRM at both Reagan Remedies and Gain More. I took over the "End-to-End" employment process, ensuring that the need for new staff was identified proactively rather than reactively. I established a Rigorous Interview and Orientation Protocol, where every new hire is not only tested for skill but also thoroughly briefed on the organization’s values. By working in "Close Sync" with the Board of Directors, I ensured that the HR policies were directly aligned with business goals, providing a stable, authoritative presence that managed everything from staff orientation to complex disciplinary actions.

Step-by-Step Process
  • The HRM workflow is a continuous loop of talent optimization:
    • Needs Assessment: Collaborating with department heads to identify when and where more staff are required.
    • Recruitment & Sourcing: Drafting job descriptions and sending out targeted interview invites.
    • The Selection Phase: Conducting interviews and vetting candidates against organizational standards.
    • Orientation & Training: Onboarding successful candidates with practical sections to ensure immediate productivity.
    • Active Management: Offering daily guidance, solving work challenges, and managing the discipline/suspension/sack protocols.
    • Board Reporting: Keeping the Board of Directors informed of all major personnel changes and organizational health.
My Contribution

My contribution was the Stabilization of the Organizational Workforce during periods of transition. I held the office of HRM at Reagan Remedies for two years (2021–2023), ensuring that the company didn't miss a beat after the previous HR's departure. At Gain More, I leveraged my HR knowledge to act as an internal anchor, handling duties that were otherwise outsourced. My "Hands-On" approach meant that I personally oversaw the orientation and discipline of staff, ensuring that the "Chain of Command" remained respected. I acted as the primary liaison between the "Front Line" workers and the "Board of Directors," ensuring clear communication at all levels.

The Results

The result was a Streamlined and Disciplined Workforce. Staff retention rates improved because employees had a dedicated manager to help them navigate work-related challenges. The recruitment process became more efficient, with shorter "Time-to-Hire" and better quality candidates. Under my supervision, the orientation programs led to faster "Time-to-Productivity" for new employees. My firm yet fair approach to discipline—including necessary suspensions and sacks—purged the organization of underperforming elements, creating a culture of excellence. Ultimately, the boards of both organizations benefited from a stable, self-managing environment where HR risks were minimized.

Future Upgrade

The future upgrade for this HRM model is the development of an Automated HR Portal. The goal is to move the "Orientation and Training" practical sections into a LMS (Learning Management System), where new hires can undergo digital training before their first day on the floor. I also plan to implement Performance Analytics Dashboards, where staff productivity can be tracked against KPIs in real-time. This will allow for "Data-Driven Commendations," ensuring that rewards and promotions are based on objective metrics, further motivating the workforce and solidifying the organization's reputation as a top-tier employer.

TROVE ID : 030

Supervision Duties

Supervision

Advanced Operational Supervision: The "Knowledge Sharing" Leadership Model

This project profile details the day-to-day supervisory responsibilities held at Reagan Remedies, Gain More Retail Outlet, and the LDC. It focuses on the Delegation and Monitoring of tasks to subordinates to ensure that all organizational goals are met before deadlines. The core philosophy of this supervisory role is that "Knowledge is for the Living," meaning that the primary duty of a supervisor is to train their team so thoroughly that they can operate seamlessly with minimal intervention. This is supervision as a "Multiplier"—turning a single manager's expertise into a collective force of highly skilled, autonomous professionals.

Skills / Tools Leveraged

Supervision at this level requires Instructional Design, Tactical Delegation, and Performance Auditing. I leverage Task Management Frameworks to assign and track duties, ensuring that no department is overwhelmed or underutilized. I utilize Practical Training Modules, which I personally organize to bridge the gap between theory and execution. My communication skills are leveraged to offer "Tactful Commendations or Corrections," a skill rooted in Emotional Intelligence (EQ) that keeps morale high while maintaining strict standards. Additionally, I use Time Management Systems to ensure that all LDC and Gain More tasks are completed well before their respective deadlines.

The Challenge / Need / Problem

A major problem in many organizations is "Managerial Over-Dependency"—where a team cannot function if the manager is absent or preoccupied. This was a potential risk at both Reagan Remedies and Gain More, especially when I had to take over higher management duties (serving as Manager when the previous manager was fired in 2025). Without a proper supervisory system, the ICT and HR departments could have collapsed under the weight of my dual responsibilities. The challenge was to create a team that was so well-trained that they could maintain a "High-Towers" level of excellence without needing constant, minute-to-minute supervision.

The Solution

The solution was the implementation of a Sovereign Subordinate Training Program. Following my principle that "knowledge should be shared to the living," I taught my subordinates every technical and administrative aspect of the job. I moved from "Direct Supervision" to "Tactical Oversight." By assigning and delegating tasks clearly and providing the necessary "Practical Sections," I empowered my team to make decisions. This allowed the departments at Reagan Remedies and Gain More to function "Seamlessly" even when I was promoted to overall Managerial duties. I replaced the need for constant surveillance with a culture of Self-Accountability and Peer-Supervision.

Step-by-Step Process
  • The supervision process follows a "Train-Delegate-Review" cycle:
    • Knowledge Transfer: Personally teaching subordinates the "How" and "Why" of every task.
    • Practical Drill: Organizing hands-on sessions where subordinates perform tasks under direct observation.
    • Tactical Delegation: Assigning tasks based on individual strengths and organizational deadlines.
    • Gap Monitoring: Overseeing the work from a distance to identify and correct any minor deviations early.
    • Commendation/Correction: Providing immediate, tactful feedback to reinforce good habits and eliminate bad ones.
    • Autonomy Testing: Gradually reducing supervision to confirm that the team is ready for "Seamless Operation."
My Contribution

My contribution was the Transformation of Subordinates into Specialists. I served as the Manager at Reagan Remedies (2021–2023) and Gain More (2025), but my greatest contribution was that my primary departments (ICT and HR) never faltered during my absence. I contributed the Training Curriculum used to upskill the staff, ensuring that everyone under my command was capable of handling their duties before deadlines. I acted as the "Mentor-Manager," ensuring that my principle of knowledge-sharing was the foundation of the team’s success. I ensured that all tasks, especially with the LDC, were completed with time to spare.

The Results

The results were a Highly Autonomous and Resilient Workforce. When I was moved to the Manager's office at Gain More in 2025, my ICT team continued to work with "Seamless Efficiency" without needing me to watch over them. The same was true at Reagan Remedies. The LDC projects under my supervision consistently hit 100% completion rates ahead of schedule. My approach reduced "Managerial Burnout" and increased "Team Morale," as staff felt empowered and trusted. The organization gained a "Deep Bench" of talent, making the entire business more robust and capable of handling sudden leadership changes or increased workloads.

Future Upgrade

The future upgrade for this supervisory model is the implementation of Peer-Review Gamification. I plan to introduce a system where subordinates can "Earn Badges" for teaching their skills to the next generation of hires, further decentralizing the knowledge-sharing process. I am also exploring the use of Remote Supervision AI, which can provide real-time task updates to my mobile device, allowing me to oversee multiple locations or departments from a single "Command Center." This will ensure that as ForraCorp grows, the "Knowledge for the Living" principle scales across every new branch and project.

TROVE ID : 031

Novelist, Writing, Editor and Authorship

Master the unseen language of the air, bridge the silent divide, and unlock the powerful secretes of the Wind Talkers.

Becoming a Wind Talker

In the days of Kings, men were forged from the crusible of combact for the freedon of the free men.
- The Legend Of A Peace Warrior

For the Love of Sparta
- BOOK I

After a desperate boy buries his only hope, the treasure vanished, forcing a high-stakes hunt to reclaim his stolen legacy.

The Lost Tresure

Neglated and broken, Sophia survives a cruel home until a mysterious benefactor risks everything to lead her into light.

From Shadows To Sunshine

. . .
- The Fray of Survival

For the Love of Sparta
- BOOK II

. . .
- The Rise of an Emperor

For the Love of Sparta
- BOOK III

She must end an ancient matriarchal legacy and embrace an unprecedented deciesions for survival. - Evelyn Ethan, Robotics engineer.

Rise of the Alpha Female

In a world of mathematical crime, Janiyah weaponizes machine learning and superior science to bring to justice those responsible.

The Shadow Agent

A reluctant woodcutter must step from the shadows of a divided forest to mend a kingdom shattered by a single letter.

Edict of Unity

A master linguist reveals the 'silent syntax' behind the machine, turning chaotic digital noise into a symphony of precision and power.

Anatomy of an AI Prompt

. . .
- The Decimation of an Empire

For the Love of Sparta
- BOOK IV

×

Audio Book

Books Written, Published and Unpublished

Skills / Tools Leveraged

As a multi-disciplinary author, I leverage a blend of narrative architecture, music composition, and audio engineering. My toolkit includes Scrivener for plot mapping, Logic Pro X for songwriting and audio production, and specialized research methodologies for forensic crime fighting and modern espionage. I don't just write stories; I build immersive worlds. My skill set extends to vocal arrangement and character-driven lyricism, ensuring that every book has a sonic identity. By integrating "Ultra-Modern" themes with "Forensic Science," I provide readers with a heightened sense of realism that bridges the gap between fiction and technical reality.

The Challenge / Need / Problem

The modern reader is increasingly distracted by short-form content and immersive media. Traditional novels often struggle to maintain engagement in a "transmedia" world. The challenge I addressed was: How do we make the reading experience multi-sensory and technically accurate? Many crime novels lack the "Ultra-Modern" forensic depth that tech-savvy readers crave, often relying on clichés. Furthermore, the emotional resonance of a scene is often left entirely to the reader's imagination, without a guided atmospheric or lyrical accompaniment to deepen the impact of the prose.

The Solution

My solution was the creation of a Hybrid Narrative Ecosystem. Every project—whether an Epic, Series, or Forensic Thriller—is a "Phygital" experience. I developed a workflow where a novel is released alongside a dedicated audio version and at least one original song that captures the thematic essence of the story. For my forensic and crime-fighting series, I consult real-world technical protocols to ensure the "Ultra-Modern" elements are plausible. This approach transforms a solitary reading act into a cinematic, auditory, and intellectual journey, setting a new standard for independent authorship.

Step-by-Step Process
  • World-Building & Research: I begin by defining the era (e.g., Epic vs. Ultra-Modern). For forensic titles, I research current DNA sequencing and cyber-surveillance tools.
  • Structural Plotting: Using a "Beat Sheet," I map out the series or standalone novel, ensuring high-stakes tension.
  • Songwriting & Composition: Parallel to writing the first draft, I compose a "Theme Song."
    • Components: MIDI Keyboard, Logic Pro, Condenser Mic.
  • Drafting & Audio Sync: While writing, I identify key emotional peaks for the audio version's cues.
  • Technical Editing: Ensuring all crime-fighting methods are scientifically grounded.
  • Final Production: Publishing the book while mastering the audio version for platforms like Audible and Spotify.
Audio BookWorking on Audio Book and Songs
My Contribution

I acted as the Sole Architect and Creator. I didn't just write the prose; I served as the composer, lyricist, and audio producer. I performed deep-dive research into forensic criminology to ensure my "Shadow Agent" style narratives were airtight. I managed the end-to-end production pipeline—from the first "Once upon a time" to the final mixed audio track. My contribution lies in the seamless integration of these diverse mediums, ensuring the music feels like an extension of the character’s soul rather than just an add-on.

The Results

The result is a portfolio of work that boasts a 360-degree engagement model. Readers report a deeper emotional connection to the characters because they can "hear" the protagonist's voice through song. My novels have successfully carved a niche in the "Ultra-Modern" thriller genre, gaining praise for technical accuracy in forensic scenes. The audio-visual-literary blend has resulted in higher retention rates and a unique brand identity that distinguishes my work in a crowded marketplace, turning a "book" into a "brand."

Future Upgrade

I plan to integrate Augmented Reality (AR) into the physical book covers. By scanning the cover with a smartphone, readers will be able to launch the theme song or a 3D visualization of a forensic crime scene described in the book. I am also exploring the use of AI-driven voice cloning to allow readers to choose different "narrator" voices for the audiobooks, making the storytelling experience even more personalized and interactive for a global audience.

ABOUT THE AUTHOR: Mr. Ubi Fredrick

The Author

The Visionary Architect of Story and Sound

Ubi Fredrick is a multi-dimensional creator whose work exists at the intersection of classical artistry and 21st-century innovation. As an author, songwriter, and tech enthusiast, he has mastered the rare ability to navigate through the "Sands of Time," seamlessly transporting readers from the rugged, honor-bound atmospheres of medieval-inspired landscapes to the high-stakes, sleek complexities of modern-day espionage.

Whether he is unraveling the intricate web of a Shadow Agent or guiding a reader through the poignant simplicity of a Lost Treasure, Fredrick’s storytelling is defined by its versatility. He does not just write stories; he constructs worlds. His deep-seated belief that "Knowledge is for the living" drives him to share wisdom through every medium at his disposal—be it the written word, composed melody, or the expressive grace of sign language.

A Master of Narrative Versatility

Fredrick’s literary portfolio is a testament to his "Word-Picture" philosophy. His writing style is distinguished by a meticulous choice of vocabulary that paints vivid, indelible images in the mind’s eye.

    Consider for example:

  • Rise of the Alpha Female:
    A flagship fictional epic of survival and resilience. Born from a unique collection of "K" phonetics, this work evolved into a profound exploration of courage. Through its detailed "Profiling Page," Fredrick offers a level of immersion rarely seen, providing exhaustive character blueprints—from physical identifiers to status and qualities—ensuring every reader feels the pulse of the island of Kyralion.
  • The Cinematic Experience:
    Elevating the traditional reading experience, Fredrick leverages AI-generated imagery and bespoke musical productions to create a multi-sensory reality. His readers don't just consume a plot; they listen, sing, and dance along with the characters, bridging the gap between a book and a living performance.
The Art of Communication Without Borders

Beyond the pen and the keyboard, Ubi Fredrick is a dedicated bridge-builder within the human experience. With a profound command of American Sign Language (ASL), British Sign Language (BSL), and Nigerian Sign Language (NSL), he serves as a seasoned instructor and interpreter.

His expertise extends into the tactile world through a mastery of Level One Braille, ensuring that his message of "Glorious Hope" is accessible to all, regardless of physical ability. This commitment to inclusivity is not just a skill—it is a voluntary mission. Fredrick remains a steadfast advocate for the truth, sharing a vision of hope with the hearing-impaired community and beyond, guided by the principle that the most valuable truths must be shared to be truly lived.

The ForraCorp Legacy

As the creative force behind ForraCorp, Fredrick integrates his love for the arts with the precision of science. His vast collection of poems, theatrical lines, and motivational philosophy serves as the "Oldest Book of Law" for his creative process. He respects all, but stands firmly on the side of truth and excellence. In a world of fleeting content, Ubi Fredrick’s works stand as legendary pillars of suspense, compassion, and technical brilliance—designed to endure the test of time and inspire the generations currently living.

Connect with the Author

Experience the world through the eyes of a storyteller who sees no limit to where a story can go or who it can reach.

Direct Inquiry (WhatsApp): +234 806 612 3142


Professional Outreach (Email): forracorp1@gmail.com

TROVE ID : 032

Song Writing and Production

Turntable

Select a Track

Loved You

I Have Loved You


Download
Battle Mantra

The Warrior's Battle Mantra


Download
Chloe

The Lost and Loved Chloe


Download
In Jehovah's Memory

Echoes of Sorrow


Download
Couple

Friends Turn Couple


Download
Phoenix King

The Rise of the Phoenix King (A)


Download
Phoenix King

The Rise of the Phoenix King (B)


Download
GM Welcome

Welcome to Gain More


Download
GM Thanks

Thank You Dear Customers (A)


Download
GM Thanks

Thank You Dear Customers (B)


Download
Survival

Lost in the Haze


Download
Kyralion Hail

Rise Kyralion, Hail to Evelyn (A)


Download
Kyralion Hail

Rise Kyralion, Hail to Evelyn (B)


Download
Giovanni's Song

The Empty Harvest A


Download
Giovanni's Song

The Empty Harvest


Download
Janiyah Song

The Unbiased Truth A


Download
Janiyah Song

The Unbiased Truth B


Download
The Ricks' Mantra

The Charging Mantra of the Ricks.


Download
Alaric-Heim Unity

The United Reich


Download
Selected Song Lyrics Would Display Here.
Information About The Selected Song Would Be Display Here.
TROVE ID : 033

"The Graillandic" Cipher Text Scripting

Graillandic Text

The Graillandic Scripting: Engineering a Sovereign Cypher for the Sparta Saga

The Graillandic Scripting (Language Graillandic) is a proprietary cryptographic system and constructed language (ConLang) developed as the primary intellectual asset for the epic book series, "For the Love of Sparta."

Graillandic TextGraillandic text in Book I

Born from a 2003 experiment in personal encryption and matured into a full-scale cultural cornerstone by 2021, this project represents a masterwork of "World-Building through Linguistics." It is not merely a collection of symbols but a functional orthography with a rich fictional history. In the narrative universe, it is the language of progress and power—the tool that allowed the Graillanders to dominate the intellectual landscape of Sparta by offering a scripted form of communication that could endure for millennia.

Skills / Tools Leveraged

This project required a multidisciplinary approach combining Cryptographic Engineering, Linguistics, and Digital Typography. I leveraged my knowledge of Grade 1 Braille, specifically the tactile cell structures analyzed in the Awake! magazine (September 8, 2000), to understand the mathematical foundations of character mapping. I utilized Symbolic Modification to pivot from a tactile system to a visual, stroke-based script suitable for parchment and stone engraving. For its integration into the "For the Love of Sparta" series, I applied Sociolinguistics to determine how the language would impact the book's world—leading to the concept of "the natural death of indigenous languages" in favor of the more efficient Graillandic. Technically, I used Pattern Recognition to ensure the characters were distinct enough for legibility yet complex enough to feel ancient.

The Challenge / Need / Problem

The project originated from a specific security need in 2003: the requirement to encrypt a personal letter containing sensitive information so that its contents remained inaccessible to unauthorized readers. Standard encryption at the time felt too common; I needed a "Physical Cypher" that was intuitive to write but impossible to decode without a specific key. Later, in 2021, the challenge shifted to a literary one. When writing my masterpiece, I needed a way to make the Graillandic culture feel authentically superior. A common problem in fantasy literature is having every culture speak a generic "common" tongue; I needed a "Visual Form of Sovereignty"—a script that looked like it belonged to a high-civilization empire.

The Solution

The solution was the birth of Language Graillandic, a custom modification of Level One Braille characters. By taking the six-dot cell structure of Braille and re-imagining it as a series of connected strokes and geometric angles, I created a script that felt "weighted" and historical. This "Graillandic Orthography" solved the literary problem by providing the Graillanders with a "Written Legacy," distinguishing them from the "Wind People" (who used gestural communication). By engineering a script that was easy to teach but difficult to master for outsiders, I provided a narrative reason for the language's expansion: it became the "Global Standard" for trade and history in the Sparta series.

Braille CharactersLevel One Braille characters
Step-by-Step Process

  • To replicate the process of creating a sovereign script based on a mathematical foundation, follow these steps:

    • Components Used:
      • Source Logic: Grade 1 Braille (6-dot matrix).
      • Drafting Tools: Fine-point pens / Digital tablet.
      • Mapping: A 26-character English-to-Graillandic conversion table.
      • Web Implementation: HTML <pre> and <code> tags with Prism.js for code display.
    • The Workflow:
      • Analyze the Matrix: Study the 6-dot Braille cell (2 columns of 3 dots). Each letter of the alphabet has a unique "address" within this cell.
      • Geometric Translation: Assign a "Stroke Rule." For example, a dot at position 1 (top left) becomes a vertical line, while position 4 (top right) becomes a horizontal dash.
      • Ligature Engineering: Determine how characters connect. Individual letter-forms must flow together to look like an ancient script.
Graillandic TextGraillandic text in Book II
My Contribution

As the sole architect of this language, my contribution was the Conceptual Synthesis of tactical Braille and high-fantasy world-building. I performed the original "Translation Audit" in 2003, ensuring the cypher was robust enough for real-world use. In 2021, I acted as the "Lead Linguist" for the Sparta series, determining the phonetic weight of the words and the visual "aesthetic" of the scribed letters. I was responsible for the cultural lore—establishing the "History of the Script" within the book, which explains why other indigenous languages were superseded by Graillandic.

The Results

The results are both practical and literary. Practically, the 2003 letter remained completely secure, fulfilling its original purpose of private encryption. Literarily, "Language Graillandic" has become a hallmark of the Sparta series’ world-building.

Graillandic TextGraillandic Scrolls

It provides a level of immersion that few books achieve. Readers see a civilization with its own "Hard Records." The "Hall of Fame" and the "Sand of Time" in the books are now populated with these characters, positioning "For the Love of Sparta" as a series with deep, layered historical and linguistic realism.

Future Upgrade

The roadmap for Language Graillandic is divided into two phases:

  • Short-Term (Digital Font Generation): The immediate goal is to map these custom characters into a TrueType (.ttf) font. This will allow the script to be used natively in software like MS Word, enabling me to "type" Graillandic text directly into future manuscripts.
  • Long-Term (Cinematic Phonology): For the film production, I intend to develop a full spoken phonology. This includes unique syntax and grammar rules, evolving the script from a "Written Cypher" into a "Living Tongue" for actors to speak on screen.
TROVE ID : 034

Multilingual and Inclusive Communication (English, West African Pidgin English, Sign Language, Braille)

Sign Language

Cross-Cultural Bridge: Polyglot, Sign Language Fluency, and Braille

Skills / Tools Leveraged

I leverage Linguistic Versatility and Inclusive Design. I am fluent in English (Professional) and West African Pidgin English (Native). Uniquely, I am a "Native" user of multiple sign languages, including American Sign Language (ASL), British Sign Language (BSL), and Nigerian Sign Language (NSL). I am proficient in Level 1 Braille (Reading and Writing).

ASL LettersASL Characters

Additionally, I have beginner-level proficiency in French, Spanish, and Greek, and I am the creator of the Graillandic Cipher/Script. If you are interested in the ASL characters, here it is.

The Challenge / Need / Problem

In a globalized world, language barriers are the greatest obstacle to progress. Specifically, the Deaf and Blind communities are often excluded from technical and creative spaces. Furthermore, in creative writing, authors often lack the depth of a truly unique linguistic identity for their characters. My challenge was twofold: to master inclusive communication for the real world and to develop a unique, encrypted writing system for my epic book series, "For the Love of Sparta."

The Solution: Graillandic & The Wind People

In 2002, driven by a need for privacy, I developed a proprietary encryption system by modifying Level 1 Braille. By shifting the "dot" positions and altering the logic of the Braille cells, I created a cipher that allowed me to store notes that only I could decode.

When I published Book 1 of "For the Love of Sparta" in 2022, I integrated this system as the "Graillandic Script" to give the Graillanders a unique cultural identity. Furthermore, I introduced the "Wind People"—a group reflecting those with speech and hearing impairments. In this world, Sign Language is known as the "Language of the Wind," and those who communicate through it are revered as "Wind Talkers." This creates a powerful parallel that honors real-world inclusive communication within a fantasy setting.

Understanding The Graillandic Cipher: The Step-by-Step Process
Graillandic TextBraille Characters

If you are familiar with level 1 Braille, that would be an advantage. However, if you are not, nevermind. In any case, here it is.

  • Foundational Study:
  • Mastery of the standard 6-dot Braille cell system.
  • Encryption Logic (2002):
  • I modified the character mapping of Level 1 Braille. By reassigning the dot configurations, I created a visual cipher that looked like Braille but read as a secret code.
  • World-Building Integration (2022):
  • I formalized the script for the Graillanders, ensuring it was visually distinct for use in the book's lore and future film adaptations.
    Graillandic TextGraillandic Text
  • Phonetic Development:
  • To prepare for the big screen, I am currently developing the spoken phonetics of Graillandic, ensuring the language has its own syntax and rhythm.
  • Inclusive Symbolism:
  • Mapping the fluid, silent movements of Sign Language to the "Wind" element, creating a respectful and mystical representation of the Deaf community.
My Contribution
ASL CommunicationReaching All With The Truth

I am a Linguistic Architect and Inclusion Advocate. I have spent over two decades evolving a private cipher into a fully realized fictional language. My contribution lies in my ability to take real-world accessibility tools (Braille and Sign Language) and elevate them into high-art and unique storytelling devices, ensuring that my book series is not only inclusive but deeply original, reaching everyone, regardless of their ability to hear or see.

The Results

The result is a multi-layered communication framework. In the real world, I can interact with the Deaf and Blind communities with ease. In my creative world, the Graillanders have a script that is "movie-ready," and the "Wind People" provide a platform for readers to appreciate the beauty of Sign Language. This unique blend of encryption, accessibility, and storytelling sets "For the Love of Sparta" apart as a masterwork of inclusive world-building.

TROVE ID : 035

Carpentry Works (Ultra-Modern Furniture)

Ultra Modern Furnitures

Ultra-Modern Modular Furniture Design & Construction

Skills / Tools Leveraged

This project utilized Advanced Joinery and Material Science. I leveraged high-grade HDF (High-Density Fiberboard) and MDF (Medium-Density Fiberboard) for their superior finish and stability. Tools leveraged include miter saws for precision 45-degree cuts, biscuit joiners for invisible seams, and pneumatic nailers. I applied skills in Modular Engineering, creating furniture that is aesthetically "Ultra-Modern" but structurally "Flat-Pack" for easy logistics.

The Challenge / Need / Problem

Traditional high-end furniture is often bulky and impossible to move once constructed. For a specific client, I needed to build a large dining table and an integrated TV stand that looked like a single, solid piece of art but could be dismantled, transported across cities, and reassembled by the owner without specialized tools. The challenge was to maintain structural integrity and a "seamless" look while engineering a "dummy-proof" coupling system.

The Solution

I designed a series of Adjustable and Modular Furniture pieces, including hanging TV stands and center tables. My solution involved a "Hidden Cam-Lock" system and color-coded dowel points. For the dining table, I created a Universal Coupling Guide—a visual, step-by-step manual that accompanied the furniture. This allowed the pieces to be transported in flat boxes, significantly reducing shipping costs and the risk of damage, while ensuring the end-user could achieve a professional-grade assembly in minutes.

Step-by-Step Process
  • Material Selection:
  • Use HDF for load-bearing surfaces (tables) and MDF for decorative panels (TV stands).
  • Precision Cutting:
  • Cut panels according to the CAD schematic, ensuring 100% accuracy for the modular joints.
  • Edge Banding:
  • Apply PVC edging using high-heat adhesive to protect the board cores from moisture.
  • Hardware Boring:
  • Use a drill jig to create precise holes for cam-locks, minifix bolts, and adjustable hinges.
  • The Coupling Guide:
  • Create a diagram labeling every panel (e.g., A1, B2).
  • List required tools (usually just a screwdriver).
  • Provide a sequence: "Insert Bolt A into Slot B; Rotate 90 degrees."
  • Finishing:
  • Apply high-gloss lacquer or laminate for that "Ultra-Modern" aesthetic.
My Contribution

I served as the Chief Designer and Lead Carpenter. I was responsible for the transition from a conceptual drawing to a physical product. I personally engineered the modular joints and authored the "Dummy-Proof" assembly guides, ensuring that my design intent survived the transition from the workshop to the client’s living room.

The Results

The project resulted in a line of furniture that received high praise for its "Modern Minimalist" look and incredible ease of assembly. The adjustable TV stands became a bestseller because they could adapt to different room sizes. Clients specifically noted that the follow-up coupling guide made them feel like "expert builders," eliminating the frustration usually associated with DIY furniture.

Future Upgrade

I plan to integrate Hidden Wireless Charging Pads directly into the HDF tabletops and TV stands. By CNC-routing a thin pocket on the underside of the wood, I can install Qi-standard chargers that are completely invisible from the surface, merging modern carpentry with my electronics background.

TROVE ID : 036

Defensive Driving (Tactical & Evasive)

Defensive Driving

Advanced Tactical, Defensive, and Evasive Vehicle Operation

Skills / Tools Leveraged

This skill set combines High-Speed Vehicle Dynamics, Threat Assessment, and Situational Awareness. I leverage advanced techniques such as J-turns, bootlegger turns, and precision PIT maneuvers. My training encompasses Aggressive Driving (tactical military chase) for apprehension and Evasive Driving (tactical escape) for extraction. The core "tool" is a deep understanding of weight transfer, traction limits, and the physics of a vehicle under extreme stress.

The Challenge / Need / Problem

In high-risk environments, a vehicle is often the most vulnerable place for a VIP or a team. Standard driving skills are insufficient when facing an ambush, a carjacking, or a high-speed pursuit. The challenge is to remain calm under fire or extreme pressure and make split-second decisions where the goal is absolute: the safety of the occupants at all costs. Conventional rules of the road are secondary to the survival of those inside the cabin.

The Solution

I operate with a "Vehicle as a Fortress" mentality. My solution to any road-based threat is a tiered response. First, I use defensive positioning to avoid being boxed in. Second, if a threat is identified, I utilize evasive maneuvers to create distance and escape. Third, in extreme scenarios where escape is blocked, I am trained to use the vehicle as a tactical tool—or weapon—to clear a path and ensure the safety of my passengers. Every turn and acceleration is calculated to maintain the vehicle’s stability while neutralizing the threat.

Step-by-Step Process
  • Pre-Drive Inspection:
  • Checking tires, fluids, and potential tracking devices or tampering.
  • Route Analysis:
  • Identifying "choke points" and secondary escape routes before departure.
  • The 360° Bubble:
  • Maintaining a constant "safe zone" around the vehicle in traffic.
  • Evasive Maneuver (The J-Turn):
  • Reverse at high speed.
  • Shift to neutral and whip the steering wheel 180°.
  • As the nose swings around, shift to Drive and accelerate away.
  • Tactical Ramming:
  • Identifying the "soft points" of an obstructing vehicle (usually the rear axle area) to push it out of the way without disabling my own vehicle.
My Contribution

To be a Tactical Driver, I learn silently from observations from one of the best - My Dad. Thus, my contribution has always been to provide high-level security through transportation. I bring a military-grade mindset to domestic or professional driving, ensuring that the mission—getting from point A to point B safely—is never compromised by external interference or road hazards.

The Results

The result is a 100% safety record in high-pressure transit. By applying defensive and evasive techniques, I provide passengers with a level of security that allows them to focus on their objectives, knowing that their "pilot" is capable of navigating even the most hostile environments with precision and tactical expertise.

TROVE ID : 037

Professional Swimming / Life Saver

Swimming

Life Saving and Aquatic Safety

Skills / Tools Leveraged

I leverage Aquatic Physiology, Rescue Techniques, and CPR/First Aid. My skills include various swimming strokes designed for different goals: Front Crawl (for speed), Breaststroke (for endurance and visibility), and Sidestroke (essential for towing a victim). I am proficient with rescue equipment such as lifebuoys, reach poles, and spinal boards.

The Challenge / Need / Problem

Drowning is a silent and rapid killer, often occurring in places where people feel most relaxed. The challenge for a life saver is not just the physical act of swimming, but the Psychology of a Drowning Victim. A person in distress is often panicked and can unintentionally pull their rescuer underwater. The goal is to reach the victim, neutralize the panic, and bring them to safety without becoming a second victim.

The Solution

I provide Active Lifesaving Intervention. My approach begins with "Scan and Identify"—spotting the signs of a "Distressed Swimmer" before they become an "Active Drowning Victim." I use the "Reach, Throw, Row, Go" hierarchy of rescue to minimize risk. If I must enter the water, I utilize the "Cross-Chest Carry" or "Hair Carry" to keep the victim’s airway above water while maintaining control of their movement.

Step-by-Step Process
  • The Approach:
  • Swim toward the victim using a head-high crawl to keep eyes on them.
  • The Break:
  • If the victim grabs the rescuer, use "Suck-Tuck-Duck" techniques to submerge and break the hold.
  • The Tow:
  • Sidestroke: Use one arm to pull the victim while the other arm and legs provide powerful propulsion.
  • Contact Tow:
  • Keep the victim's chin above water.
  • Extraction:
  • Safely removing the victim from the water (using a lift or ramp).
  • Resuscitation:
  • If the victim is unconscious, immediately begin the ABCs (Airway, Breathing, Circulation) and perform CPR if necessary.
To be a Tactical Driver,
My Contribution

I am a good Life Saver. I learned by observing the best of the best, and coached by a Certified Pro. Mr. Yopele. At present, my contribution goes beyond just monitoring the water; I serve as a first responder. I have been trained to maintain a "calm in the storm" presence, directing others on land while performing the physical rescue in the water.

I am a Certified Life Saver. My contribution goes beyond just monitoring the water; I serve as a first responder. I have been trained to maintain a "calm in the storm" presence, directing others on land while performing the physical rescue in the water.